BATHROOM REMODEL · CANE CREEK
Out of the Eighties, Into the Light: A Cane Creek Master Bath
A Tub at the Window and a Shower That Won’t Leak
Pink tile, a mauve jetted tub, and stained glass blocking the garden view. We took it down to the studs and built it back bright, simple, and built to last.
Master Bath Remodel · Cane Creek · 2½ weeks · Full gut, tile shower with niche, freestanding tub, shiplap walls, wood-look tile floor.
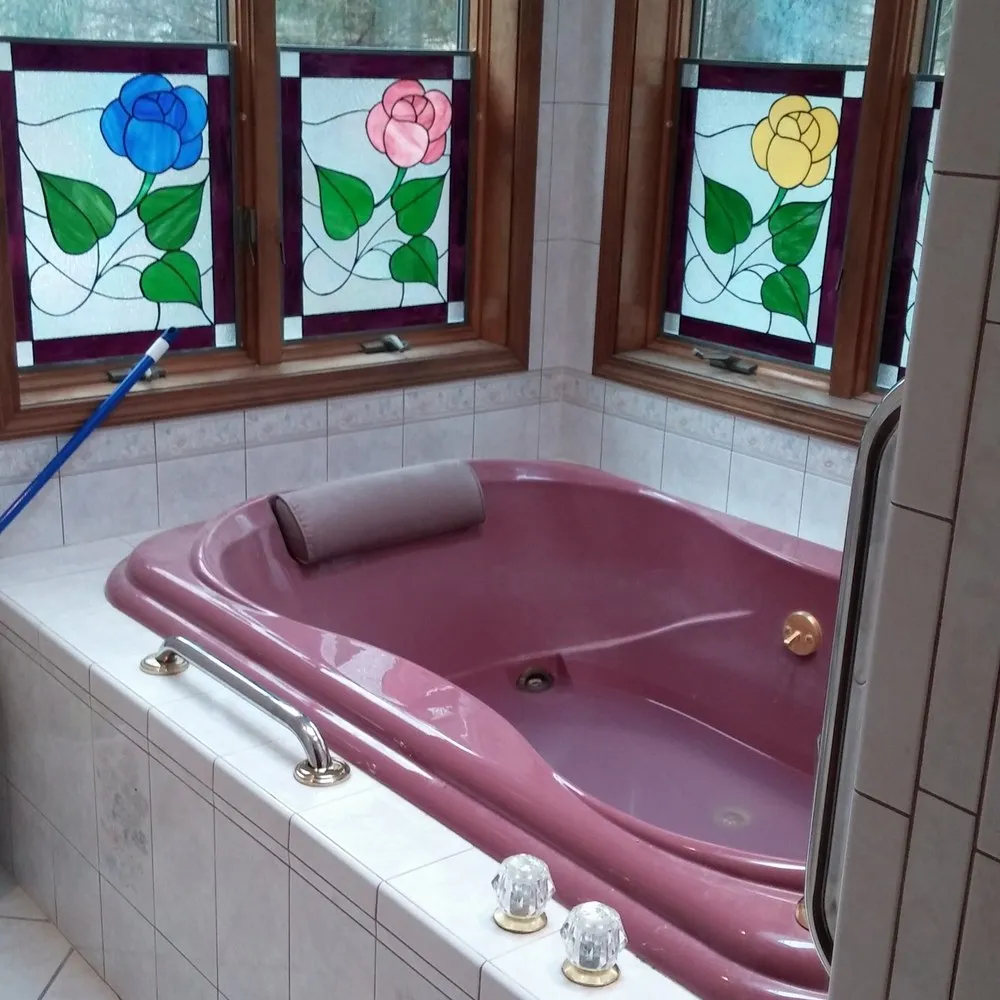
Before: the jetted tub and the stained glass corner.
Frozen in 1982
Pink tile on every wall. A mauve jetted tub. Stained glass panels where a view of the garden should have been. The homeowners had lived with it long enough.
How It Started
They didn't start with the master bath. They first called me to fix a guest bath another installer had left half done. I repaired the tile, then tore out the bad shower and built it back right. That job earned their trust. The master came next.
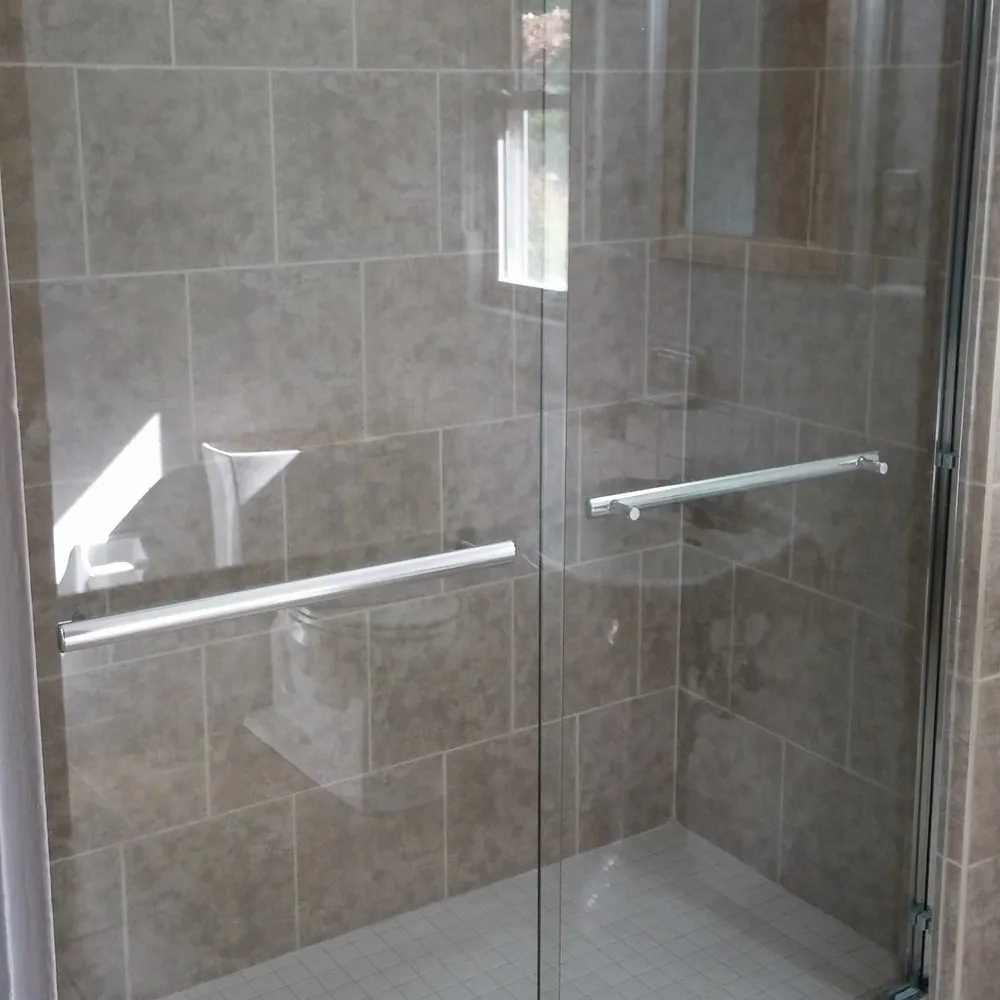
Their first job: the guest bath shower, rebuilt right
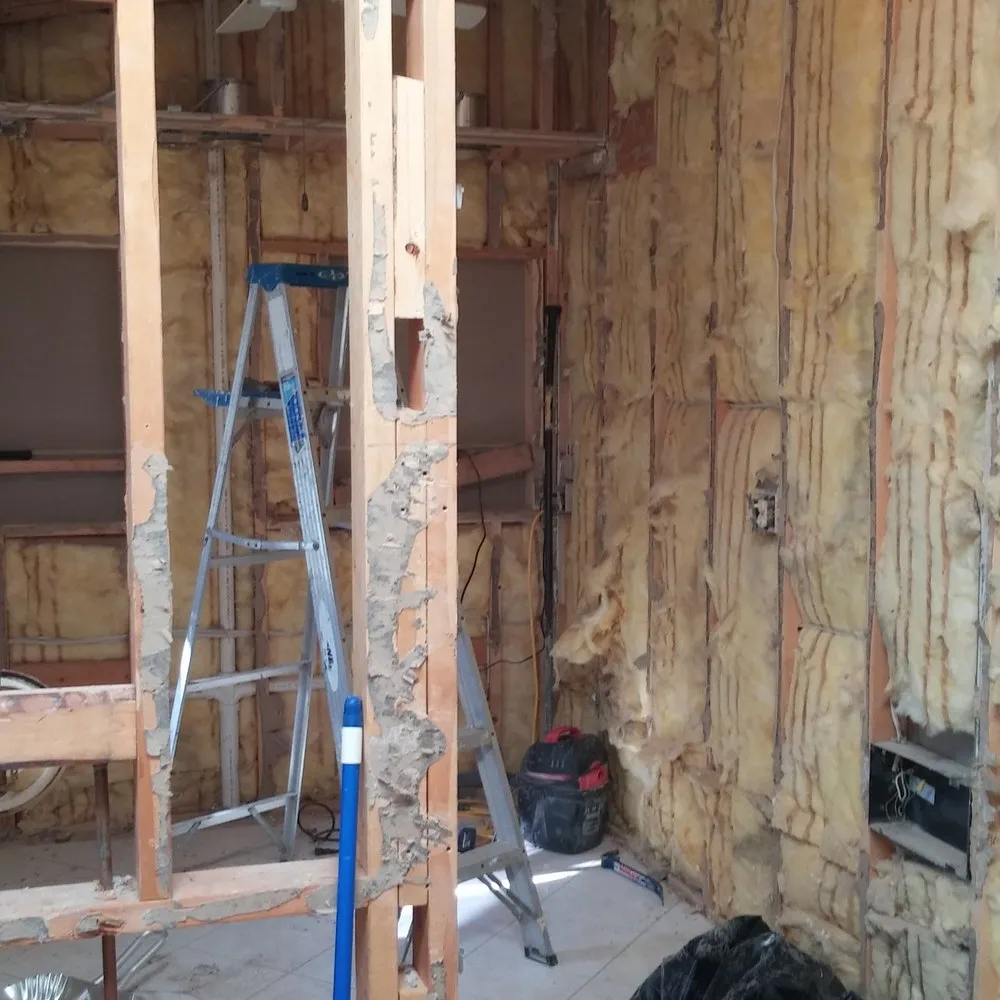
During: gutted to the studs.
Down to the Studs
Every bit of old tile, wallboard and flooring came out. When you start over, you start at the framing. The plumbing moved to new locations, so the rough-ins and some framing were redone to match. And wherever the owner wanted towel bars and hardware, I put solid blocking in the wall first, so nothing ever pulls out of the drywall.
The Part You’ll Never See
Most showers fail behind the tile, where nobody looks. This one got cement board on the walls and a waterproofing membrane over every seam and corner before a single tile went up. That's the job.
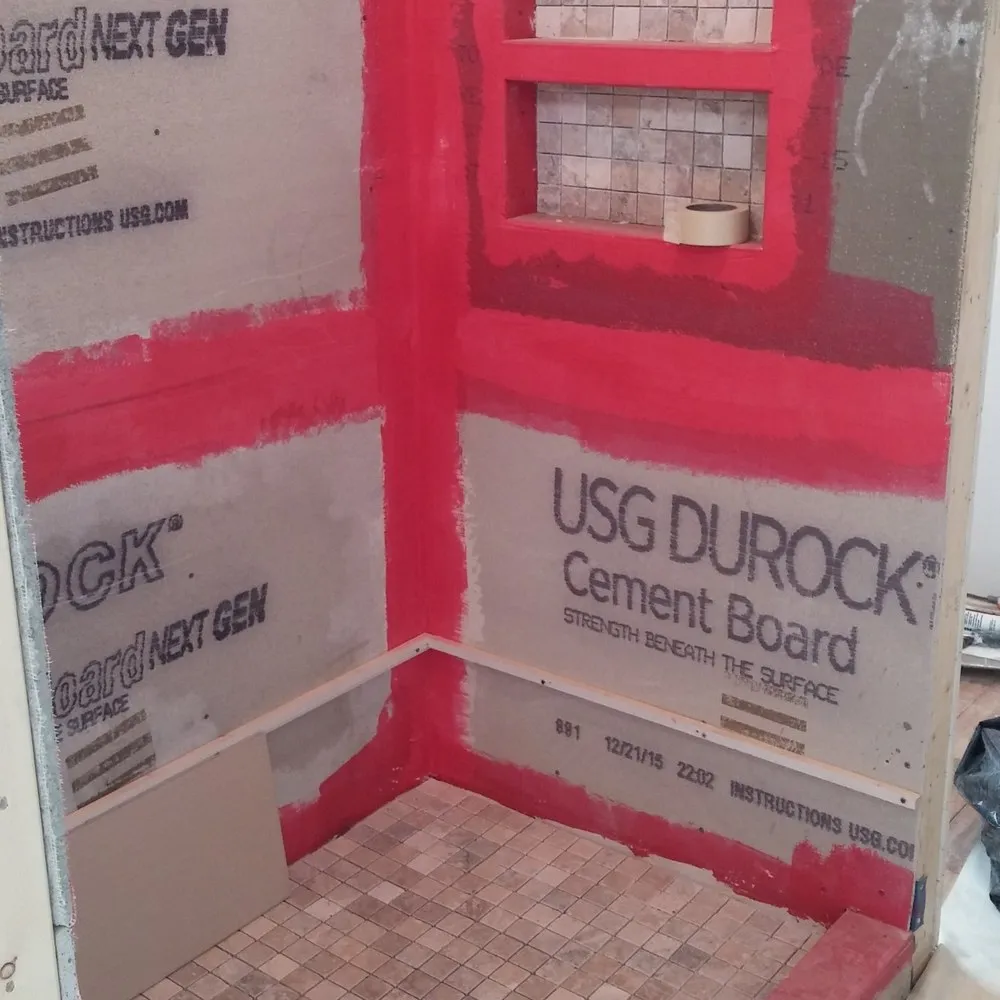
During: every seam sealed, before the tile.
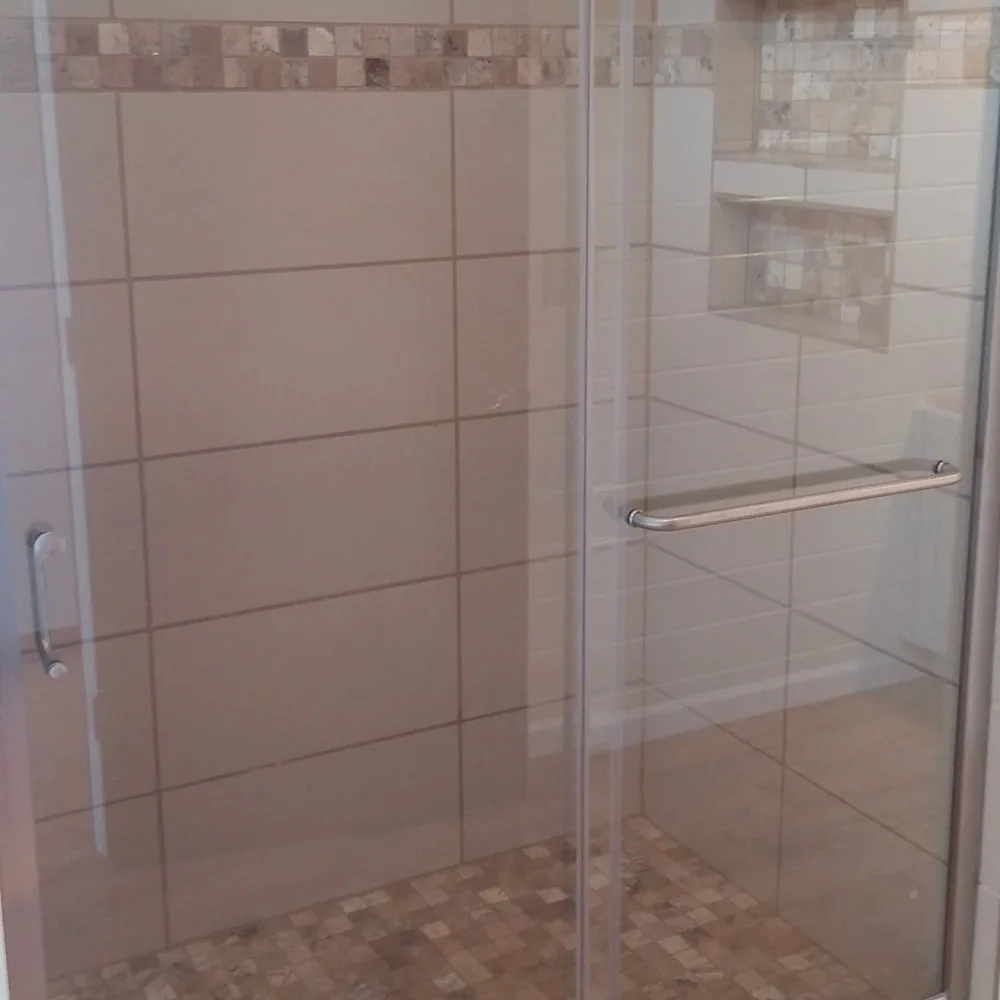
After: the finished shower.
A Shower Built to Last
Large porcelain panels with a fine linen texture, crossed by a band of tumbled stone. The same stone covers the floor in a small mosaic, and a clear glass door finishes it.
A Place for Everything
Every shower needs a spot for shampoo and soap that isn't the floor. I built a two-shelf niche right into the tile wall, lined in the same tumbled stone as the floor, and waterproofed it like the rest of the shower.
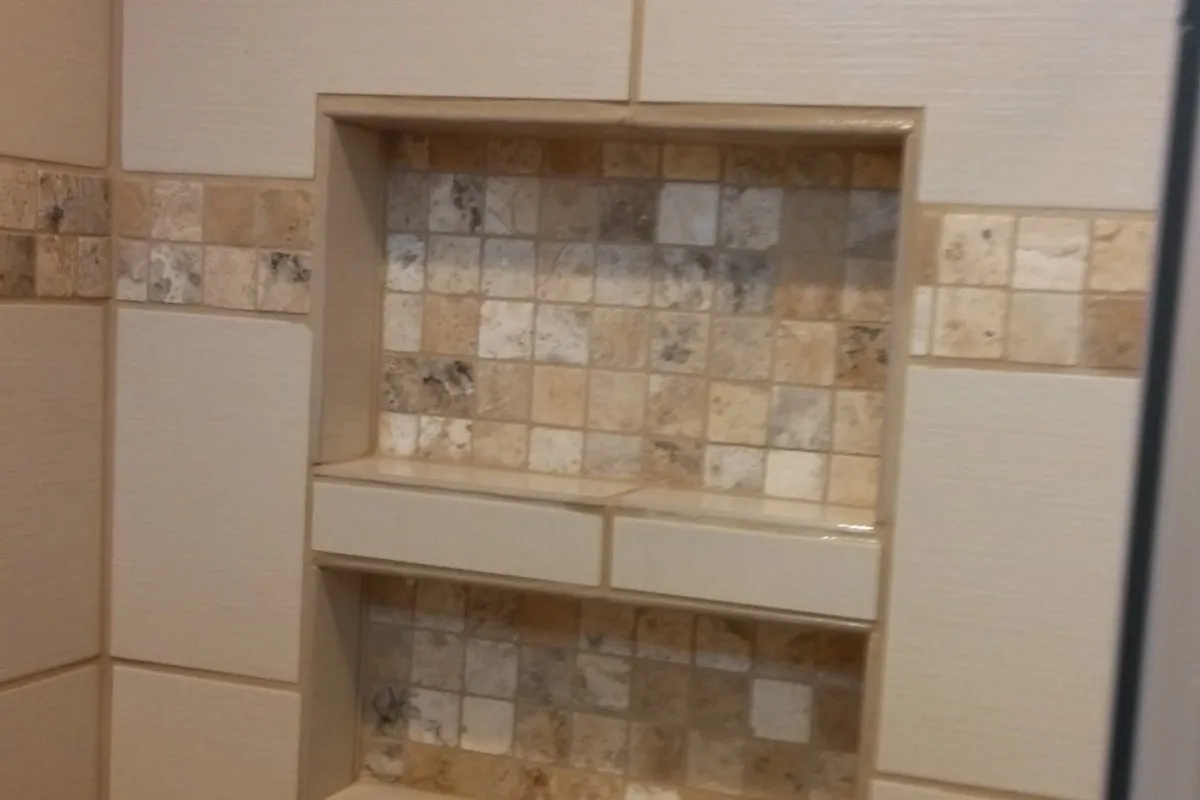
After: the built-in niches
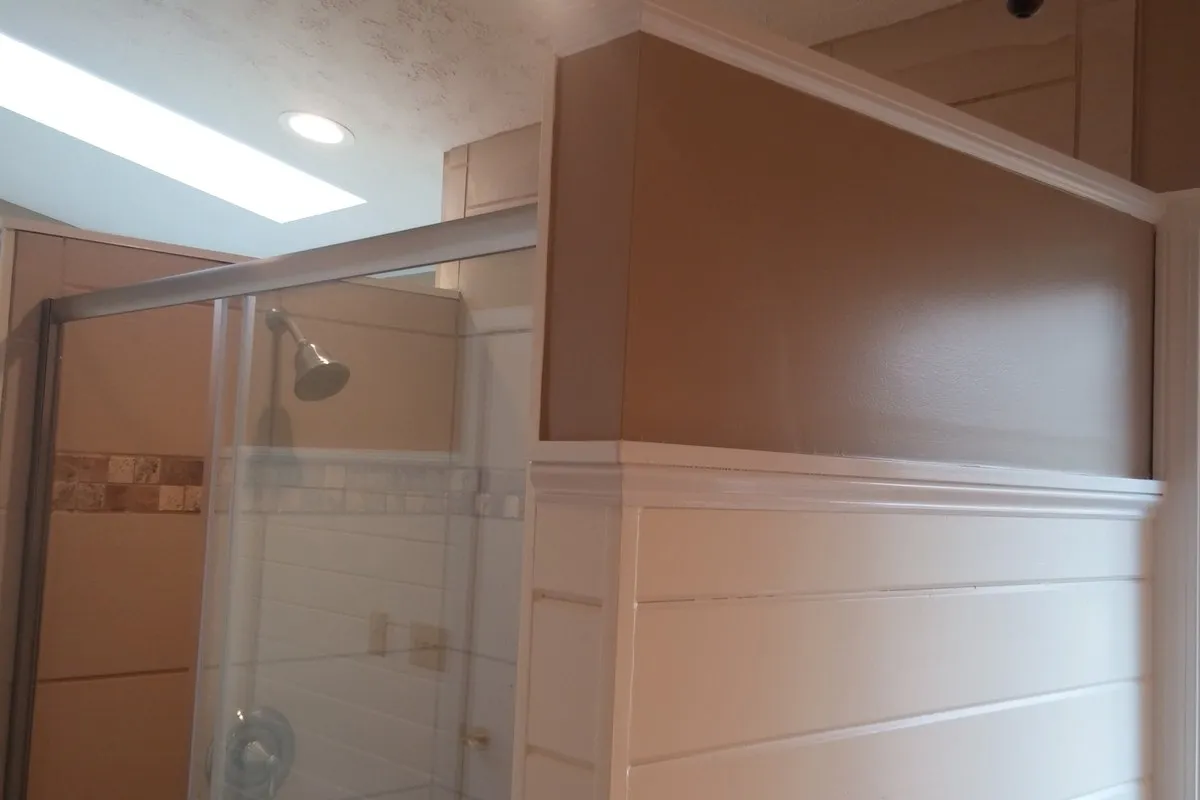
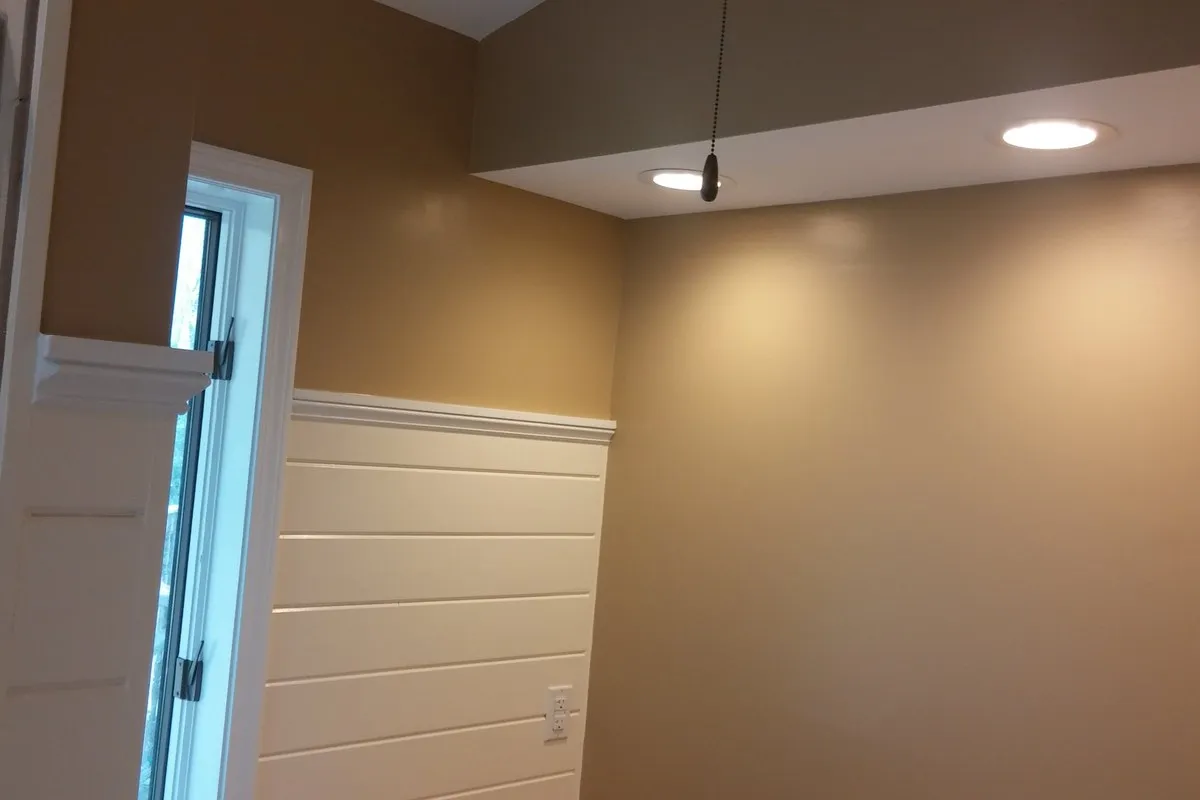
After: shiplap walls with a cap rail.
Shiplap, Capped at Six Feet
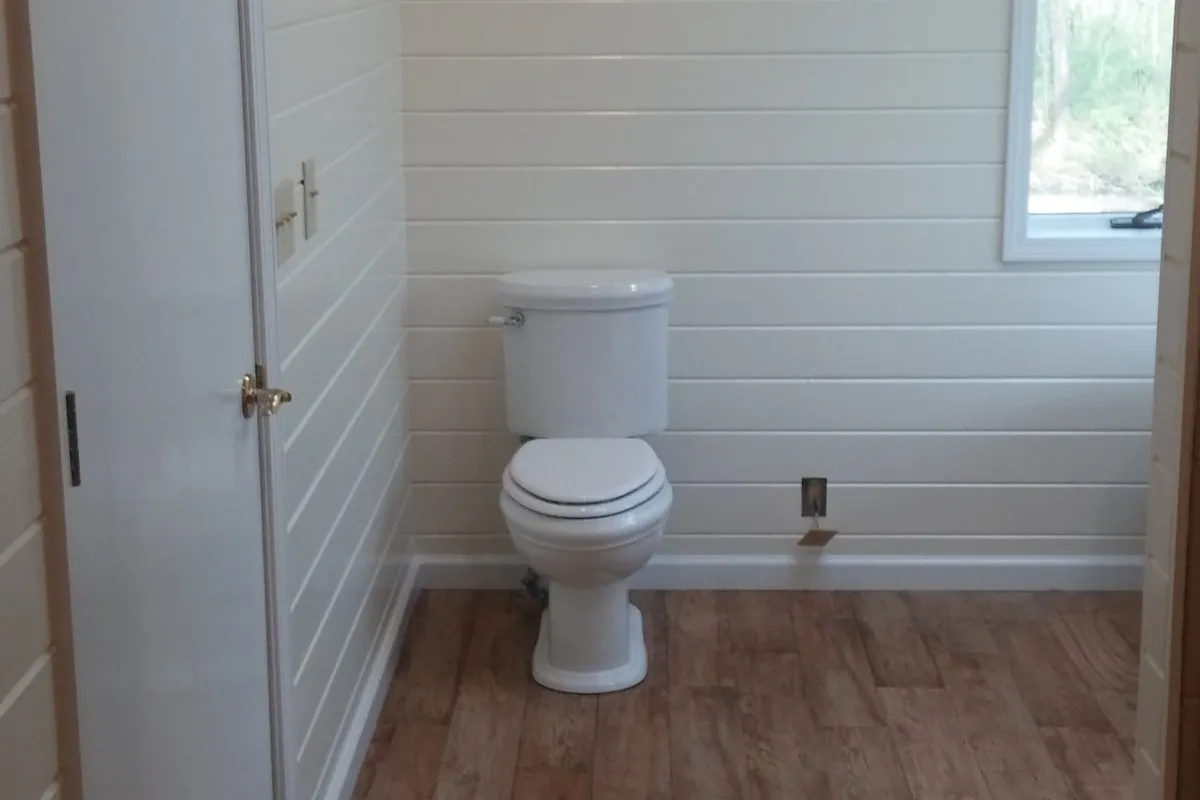
Instead of tile floor to ceiling, the owner chose shiplap up to six feet with a cap rail, painted crisp white in semi-gloss. It gives the room a clean, modern farmhouse look. And semi-gloss wipes clean, which matters in a bathroom.
Refinish the Cabinets: Savings Strategy
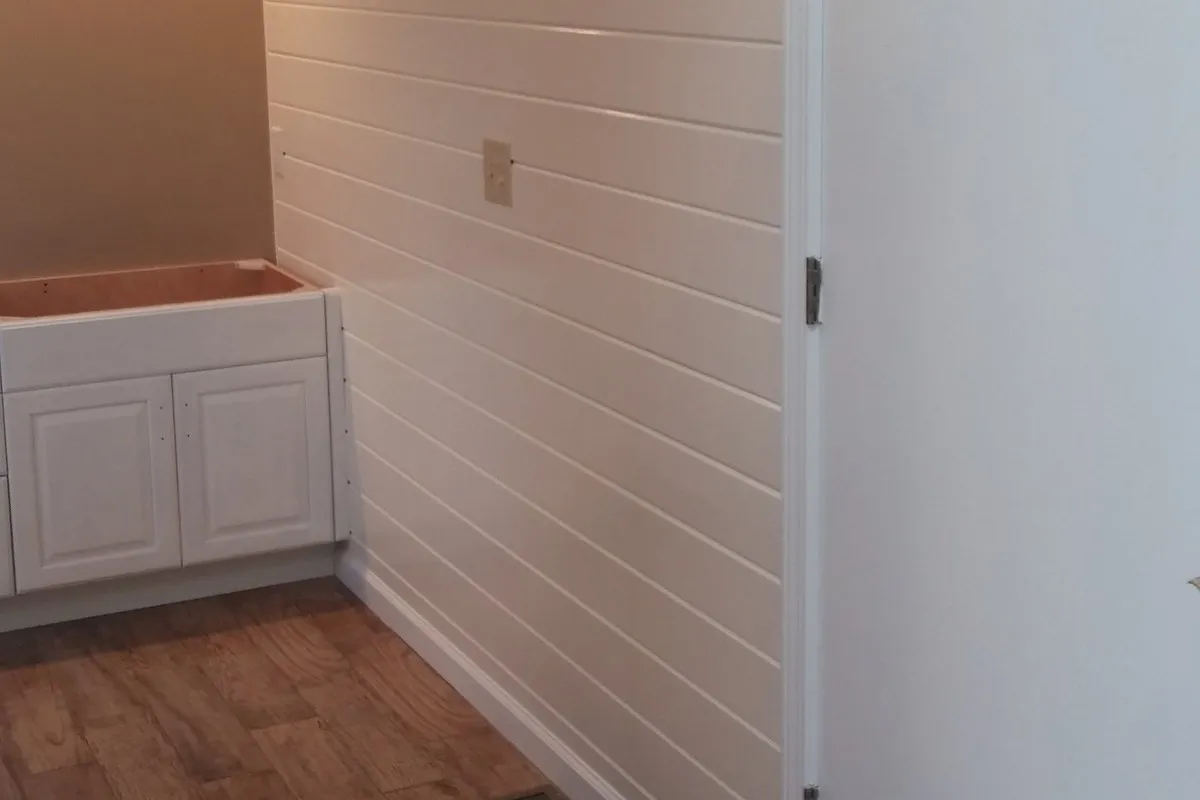
The vanity cabinets were solid, just dated. So instead of paying for new ones, I painted the originals white and topped them with a new marble counter from a stone specialist. Same cabinets, new look, and the savings went into the rest of the room.
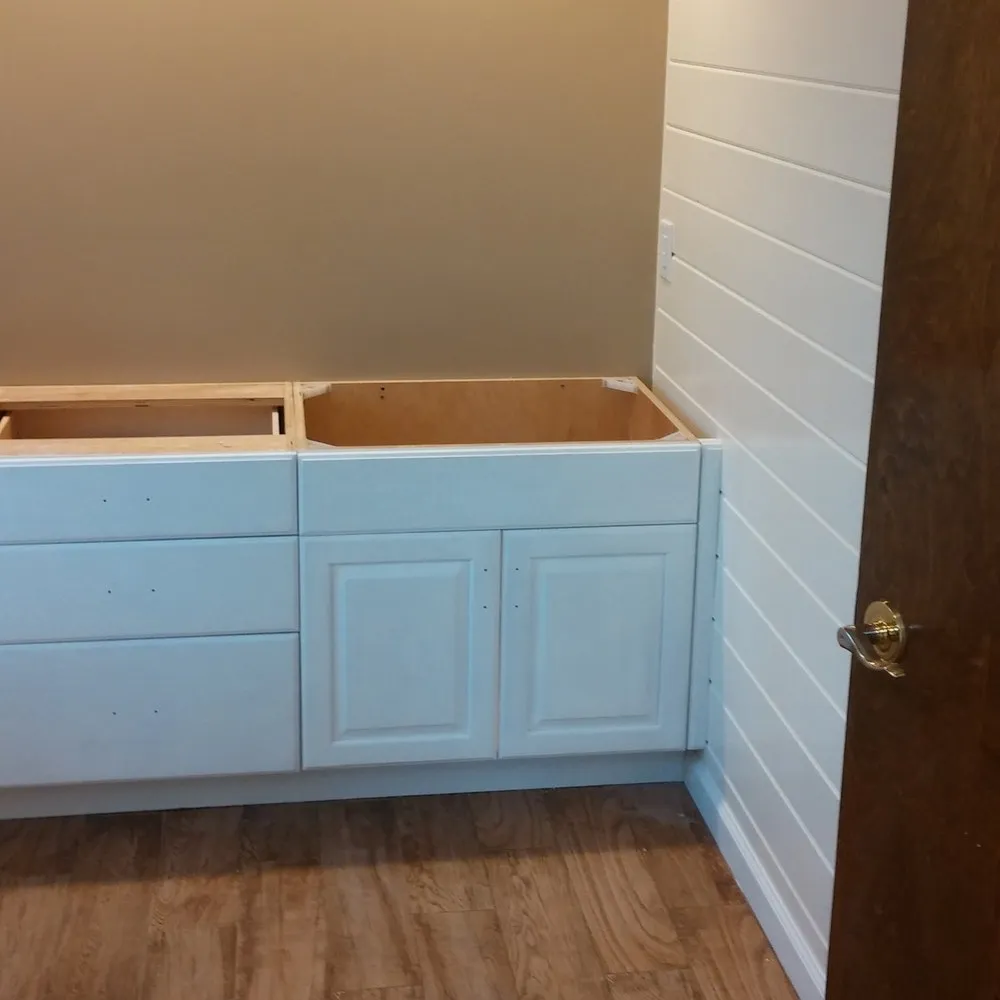
During: the original cabinets, painted white, ready for the new top.
A Bath With a View
The jetted tub and the stained glass are gone. A freestanding slipper tub sits right at the windows, so she can soak and look out over the garden. White shiplap, a vaulted ceiling, and wood-look tile floors that don't mind water.
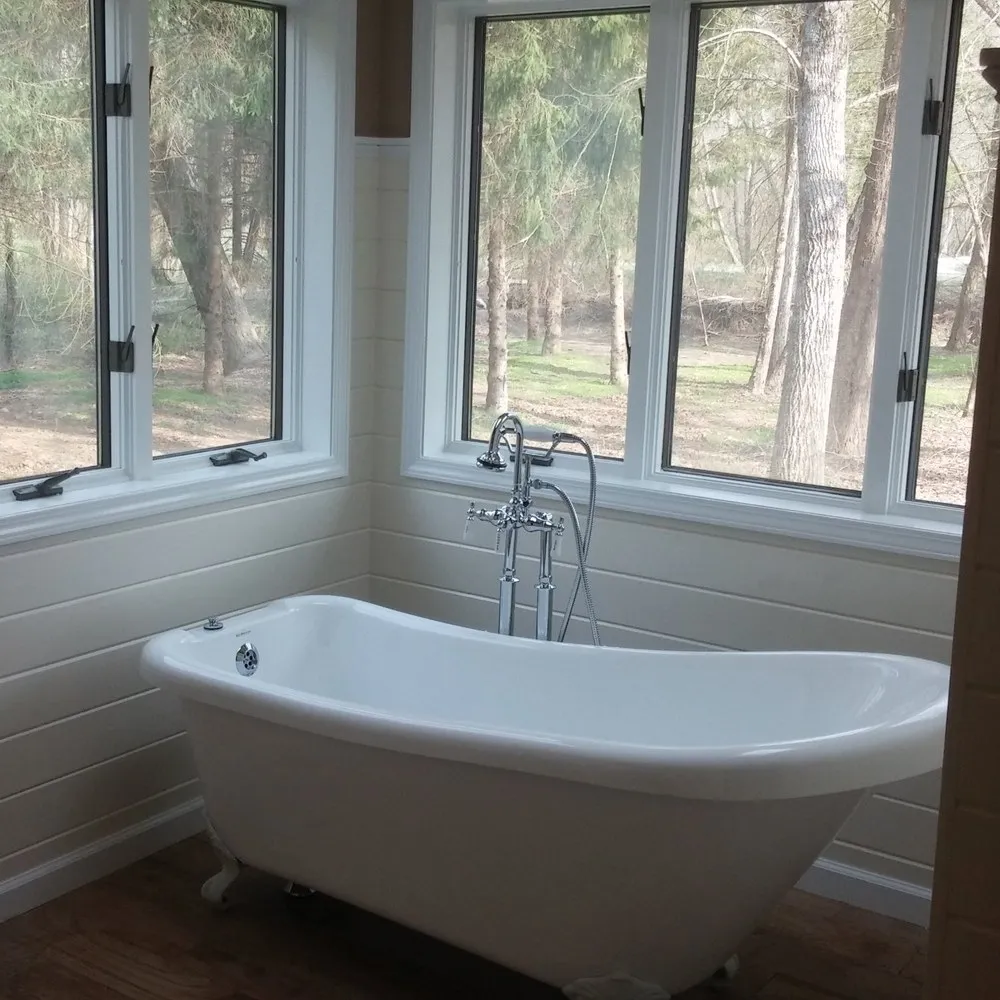
After: same corner, new view.
At a Glance
- Gutted to the studs; plumbing moved and the rough-ins redone
- Cement board and waterproofing membrane behind every tile
- Porcelain and tumbled stone shower with a built-in two-shelf niche
- Shiplap capped at six feet, in semi-gloss white that wipes clean
- Original vanity cabinets painted, with a new marble top
- Freestanding tub at the windows, stained glass removed - Wood-look porcelain tile floors
- 2½ weeks, start to finish
Three Simple Steps
From Your Vision To a New Reality
Getting work done on your home shouldn't be a hassle. Here's how it works.
STEP 01
Tell Me About Your Project
Answer a few quick questions about your home and the job.
Takes about 2 minutes
Add photos if you have them
No cost, no obligation
STEP 02
I Will Meet You Onsite for a Quote
I'll call you to discuss the project, then set a time to see the job in person. You'll be talking with me, not a salesman.
A real phone call from me
In-home visit at a time that works for you
Straight answers, no pressure
STEP 03
You Get a Written Quote
I will provide all the details and specifications, line by line, no surprises. If it looks right, we pick a start date and I get the work done.
Firm, detailed written quote
Clean up every day
Finished on time
Free in-home estimate · Written, detailed pricing · No obligation
FREE IN-HOME ESTIMATE
Start Your Project
Fill out the short form and I'll call you to talk through the job. If it's a good fit, I'll come out, look it over, and give you a clear written quote. Prefer to talk first? Call me at (828) 761-6760..
Where I Work
Asheville, Arden, Hendersonville, Brevard and Waynesville
Nearby areas, just ask
Remodel Asheville · John McMullen · (828) 761-6760
Serving Asheville, Arden, Hendersonville, Brevard and Waynesville
Privacy Policy · Terms
© 2026 Remodel Asheville