Siding Repair · Isle of Palms
How Clogged Gutters Quietly Rotted the Walls of an Isle of Palms Home, and How We Made It Right
From the street the damage didn't look like much, which is exactly why it's worth a closer look at your own house before the next big rain.
William and Alice N. live full time on the Isle of Palms, under a canopy of live oaks that kept filling their gutters with leaves, so for years the rain spilled over onto the fascia and ran down the siding, the corners and around the windows. Once the siding came off we found rotten plywood and soft wall studs underneath, so we cut out every bad board until we reached solid wood and rebuilt the walls from the framing out. In about seven days the walls had new studs, insulation, sheathing, weather wrap, trim and siding, all primed and painted, and the gutters were cleaned, sealed and rehung so the water goes where it belongs.
Siding Repair · Isle of Palms · About 7 days · Rot removal, new studs and sheathing, weather wrap, new siding and trim, gutter repair, prime and paint
Free in-home estimate · Written, detailed pricing · No obligation
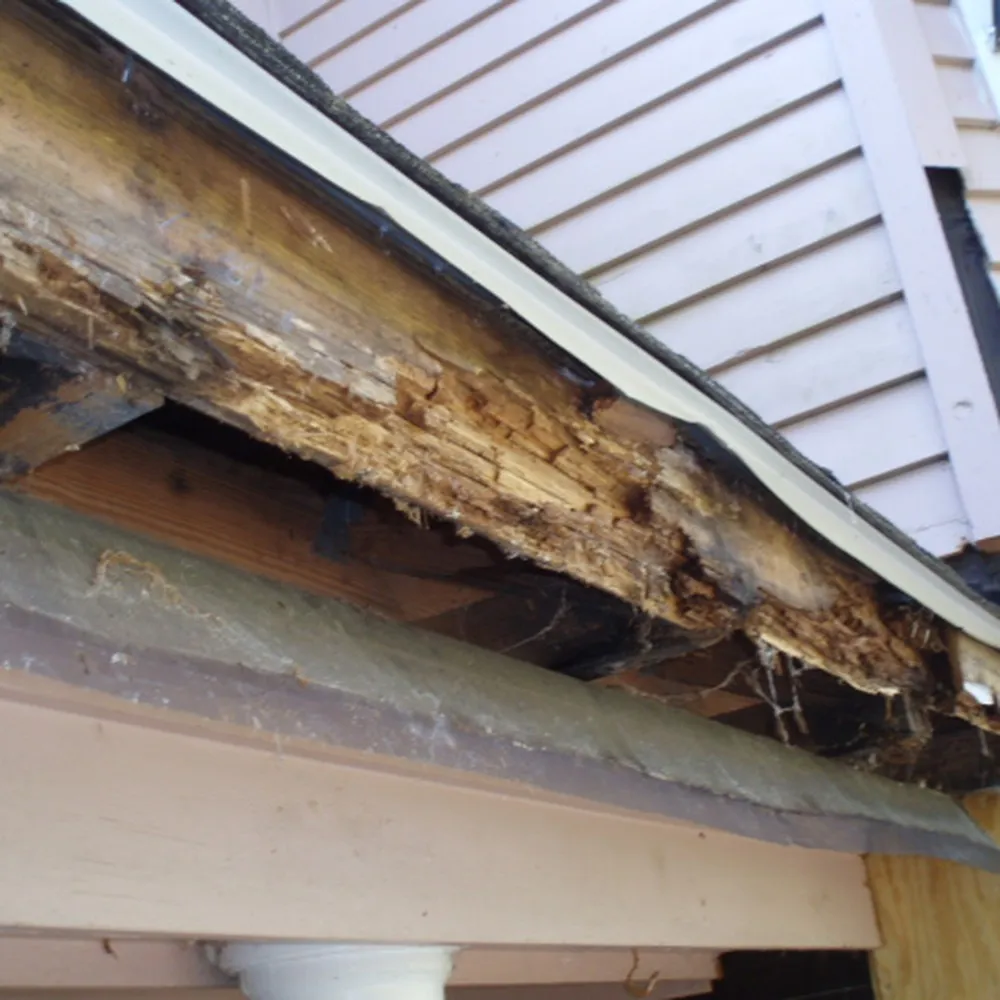
The fascia behind the gutter, rotted through from years of overflow.
It Started Up at the Roof Edge, Where the Gutters Kept Overflowing
The home sits under a canopy of live oaks, and their leaves had been clogging the gutters for a long time, so every hard rain spilled over the top and soaked the fascia boards behind them. Wood that stays wet like that never gets a chance to dry out, which is how a board that looks a little tired from the ground turns soft and crumbly all the way through.
The Siding Was the First Sign of Trouble, and the Real Damage Was Behind It
Once the water got past the fascia, it ran down the face of the house and soaked into the siding, the corners and the trim around the windows, which is where it does the most harm. We didn't know how bad it was until we started pulling boards, and as soon as this corner came open we could see the plywood behind it was stained black and rotting away.
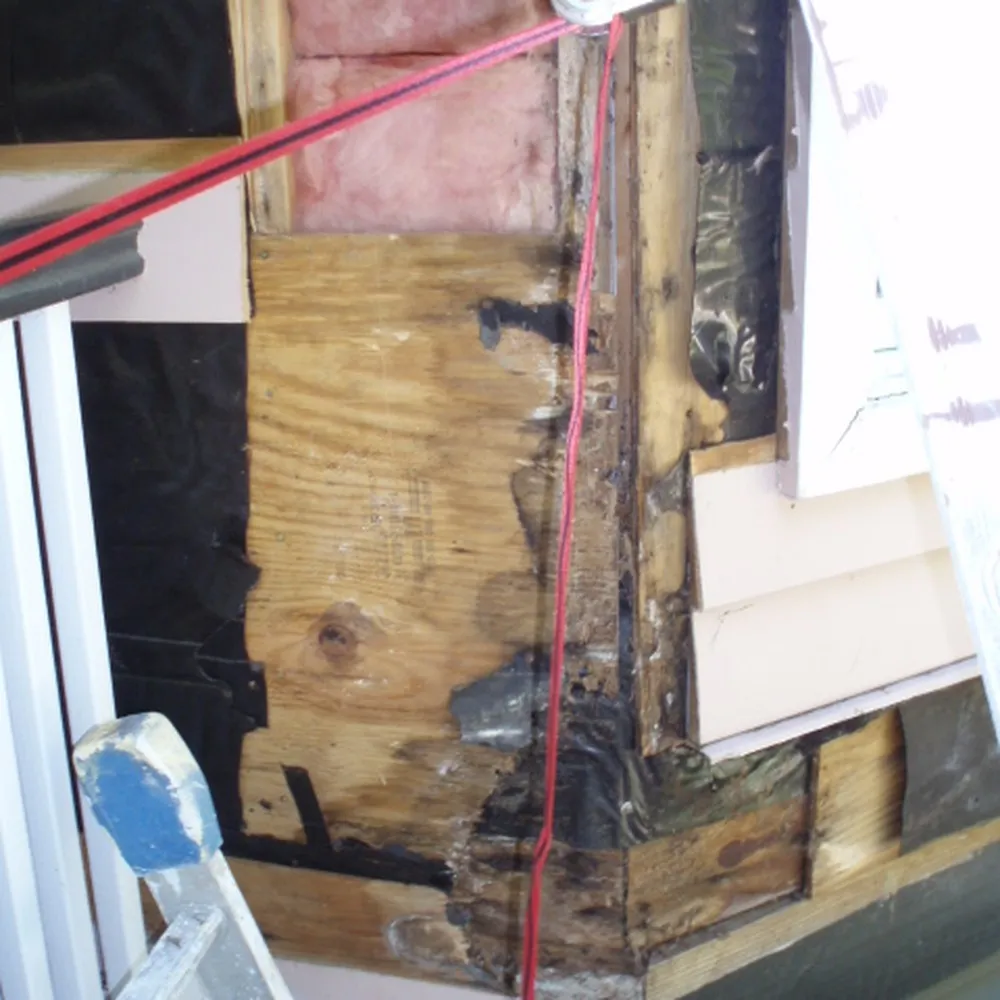
One corner opened up, with the rotten plywood showing behind the old siding.
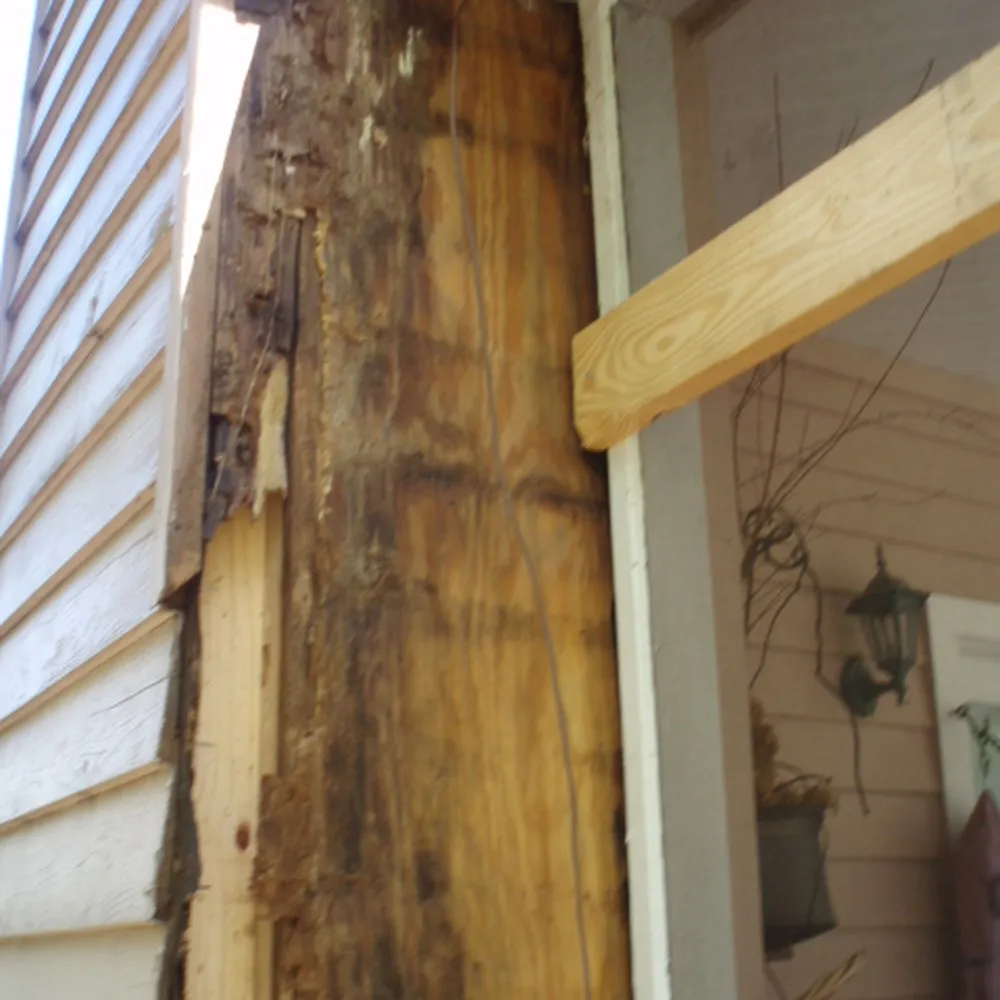
Water stains and rot running the full height of the wall sheathing.
The Trick Is to Keep Removing Rotten Wood Until You Reach Good, Solid Boards
Rot doesn't stop at a nice straight line, so the only way to fix it for good is to keep taking out bad boards until you reach wood that's still in good shape. All too often, damage that doesn't look too bad from the outside turns out to run deep once you start the demolition, and this wall was a good example of that.
In a Few Spots the Rot Had Reached the Wall Studs That Hold the House Up
Along the chimney chase and a few other walls, the water had worked its way past the sheathing and into some of the structural studs, so those came out and new ones went in. I take a job like this one step at a time, cleaning up as I go and doing my best not to leave any open framing exposed to the weather overnight.
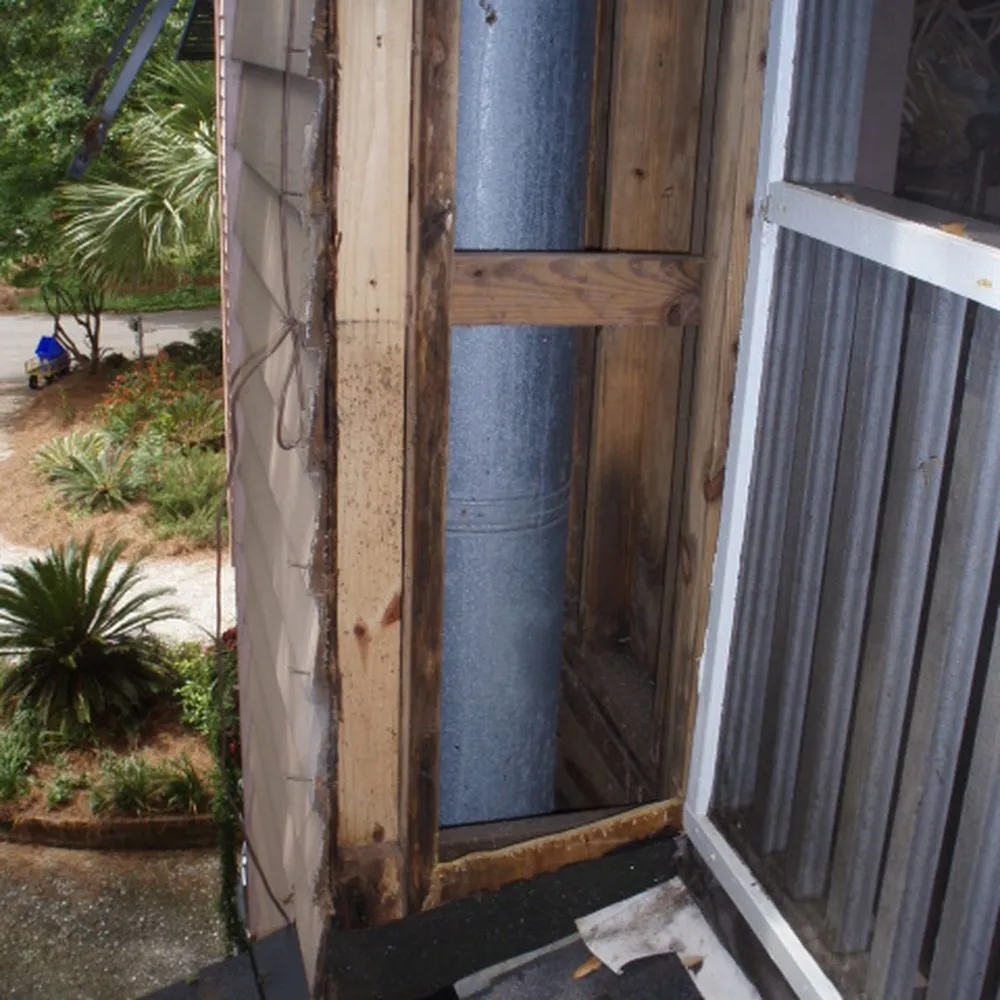
The chimney chase stripped down to the framing, ready for new studs.
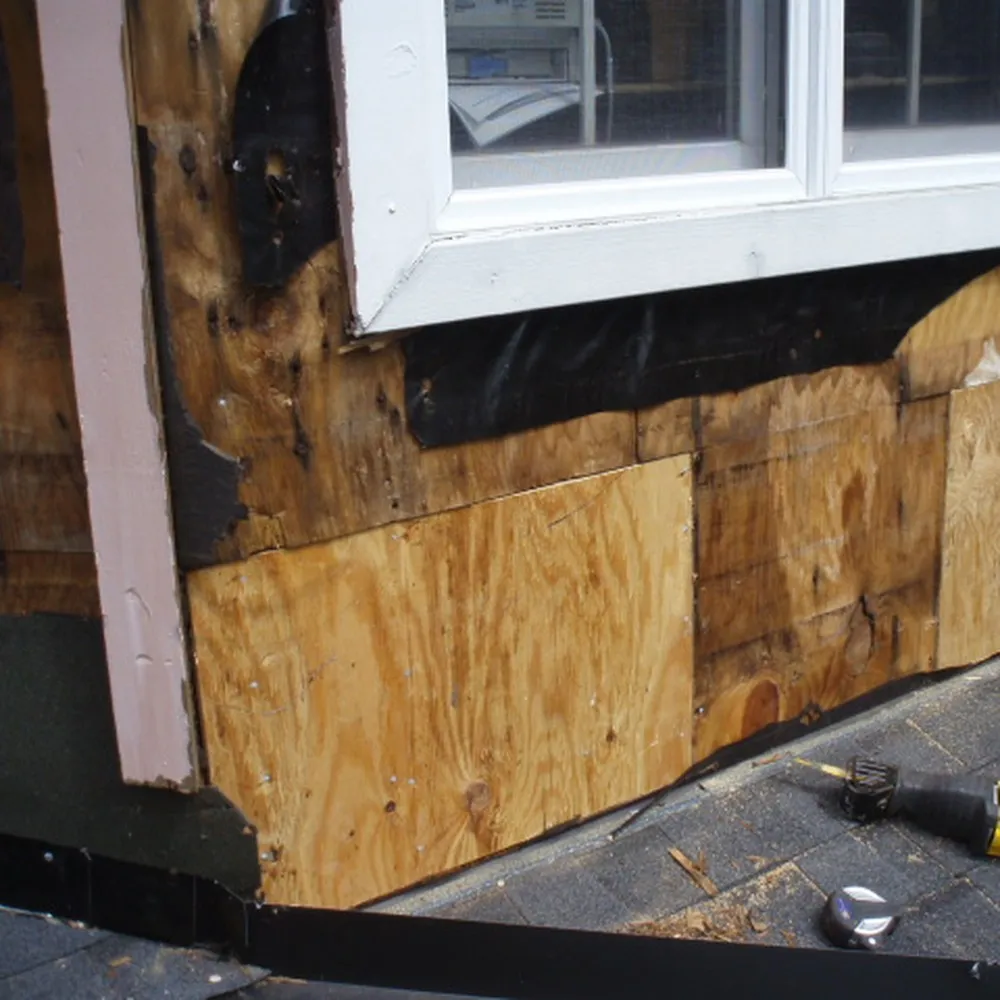
New plywood sheathing patched in below the window, where the rot used to be.
Once We Got to the Root of the Problem, Building Back Was the Easy Part
With the rotten wood gone and the framing sound again, we insulated the open walls and installed new plywood sheathing, fitting each piece tight against the good boards we'd saved. Digging all the way down to the real problem is the hard work on a job like this, and once that's done, putting the wall back together goes pretty quickly.
Before Any New Siding Went Up, the Walls Got Properly Weatherproofed
We wrapped all the new sheathing in a weatherproofing wrap and sealed around the windows with waterproof seal tape, because the windows are where water most likely finds its way back in. Nobody will see this layer once the siding goes on, but it's the part that keeps the next hard rain out of the walls for years to come.
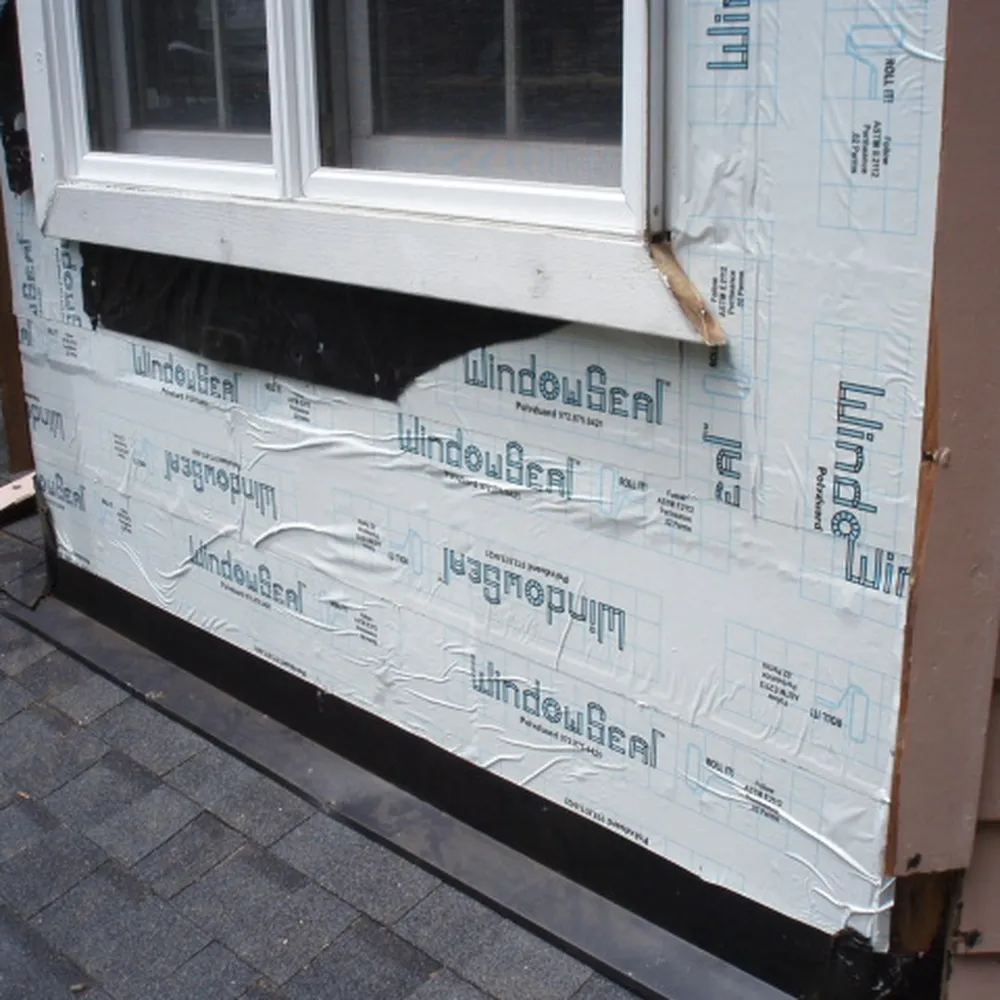
Weather wrap over the new sheathing, with seal tape under the window sill.
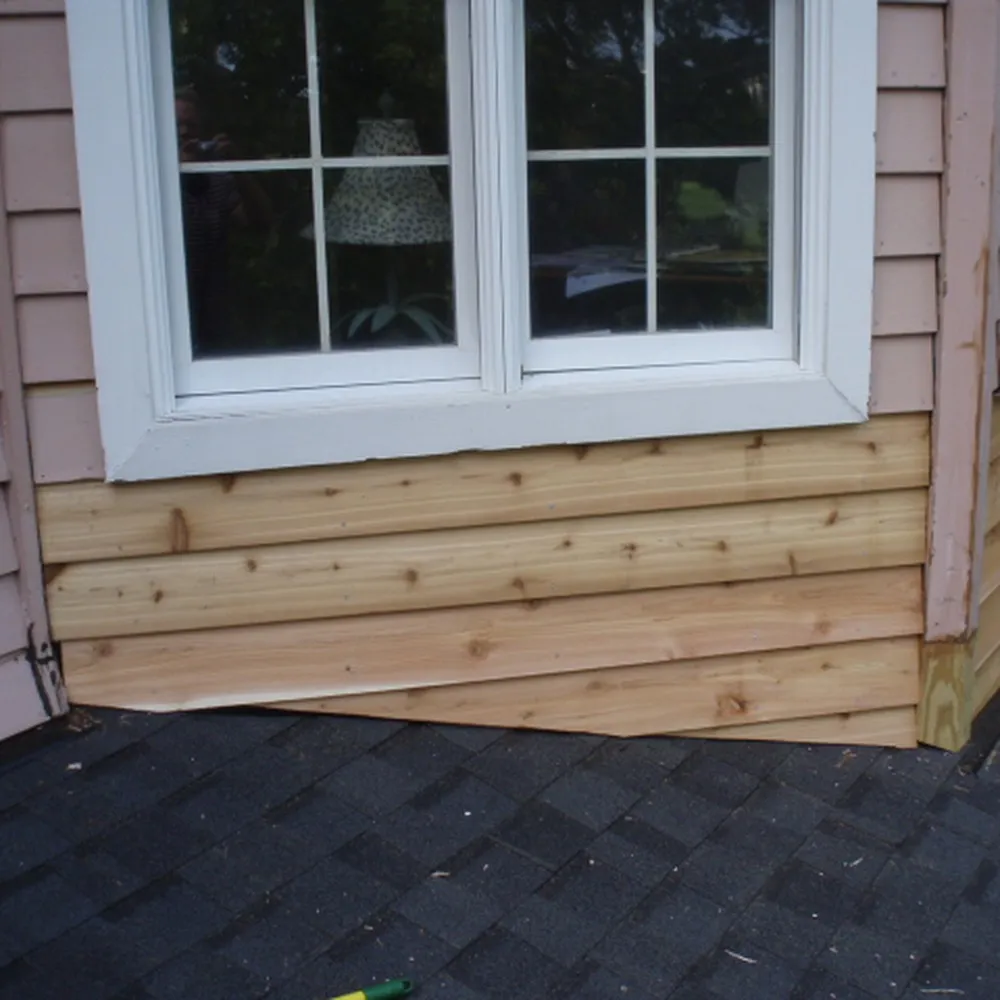
New siding under the windows, shown here before primer and paint.
New Siding and Trim, Fitted So the Repair Blends Right Into the Rest of the House
Then came the new trim and siding, laid in to line up with the old boards, and every joint got caulked before the whole repair was primed and painted to match the house. The main goal on a job like this is to make the new work look like the problem never happened, so the house reads as one piece again from the street.
The Gutters Got Fixed Too, So the Water Goes Where It's Supposed to Go
With the walls rebuilt, we cleaned out the gutters, added new end caps, sealed them and hung them back up so they drain the way they should, and then gave the whole job one final cleanup. Before I left, I set William and Alice up on a maintenance schedule to keep the gutters clear and the paint in good shape, because we see the same problem here in the mountains around Asheville, where heavy rain and lots of trees make yearly checkups the cheapest repair there is.
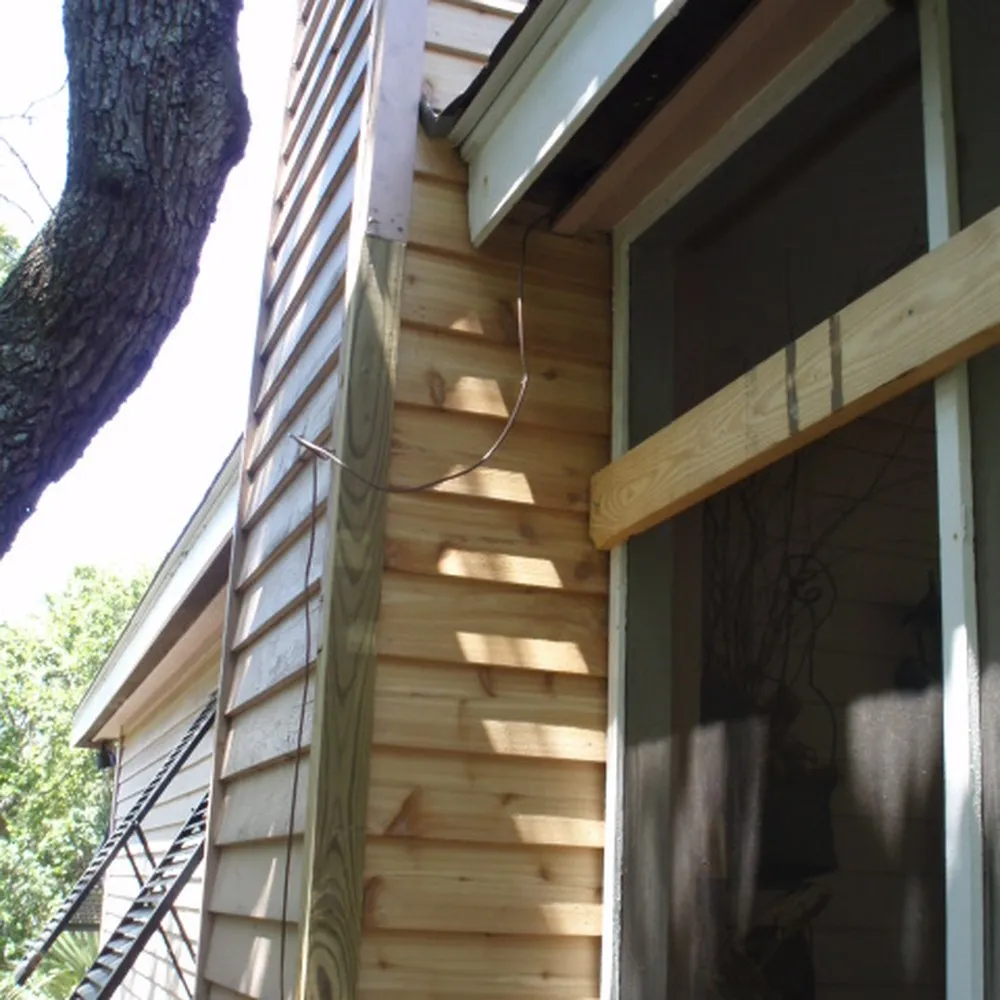
The chimney chase rebuilt and sided, under the same live oak that started it all.
At a Glance
- Leaves from the live oaks clogged the gutters, so rain spilled over onto the fascia for years
- The water ran down the siding, the corners and around the windows, rotting the wood behind them
- We removed every rotten board until we reached solid wood, which went deeper than it looked from outside
- Damaged wall studs were replaced, then the walls were insulated and covered with new plywood sheathing
- Weather wrap and waterproof seal tape around the windows keep the next rain out of the walls
- New siding and trim were installed, caulked, primed and painted to blend in with the house
- The gutters were cleaned, given new end caps, sealed and rehung so they drain properly
- The whole repair took about seven days, with a maintenance plan to keep it from happening again
In Their Own Words:
"I had no idea how bad the rotten wood extended. Thank you for doing a good job and getting to the bottom of the problems. The house looks great again, and I feel good the water is no longer getting into our walls."
William N., Isle of Palms
Three Simple Steps
From Your Vision To a New Reality
Getting work done on your home shouldn't be a hassle. Here's how it works.
STEP 01
Tell Me About Your Project
Answer a few quick questions about your home and the job.
Takes about 2 minutes
Add photos if you have them
No cost, no obligation
STEP 02
I Will Meet You Onsite for a Quote
I'll call you to discuss the project, then set a time to see the job in person. You'll be talking with me, not a salesman.
A real phone call from me
In-home visit at a time that works for you
Straight answers, no pressure
STEP 03
You Get a Written Quote
I will provide all the details and specifications, line by line, no surprises. If it looks right, we pick a start date and I get the work done.
Firm, detailed written quote
Clean up every day
Finished on time
Free in-home estimate · Written, detailed pricing · No obligation
FREE IN-HOME ESTIMATE
Start Your Project
Fill out the short form and I'll call you to talk through the job. If it's a good fit, I'll come out, look it over, and give you a clear written quote. Prefer to talk first? Call me at (828) 761-6760.
Where I Work
Asheville, Arden, Hendersonville, Brevard and Waynesville
Nearby areas, just ask
Remodel Asheville · John McMullen · (828) 761-6760
Serving Asheville, Arden, Hendersonville, Brevard and Waynesville
Privacy Policy · Terms
© 2026 Remodel Asheville