Tractor Shed · Mills River
A New Tractor Shed That Looks Like It Was Always Part of the Barn
Built Strong for the Wind, Tall Enough for the Roll Bar, and Trimmed in the Barn's Own Boards
Thad and his family had just bought a new Kubota for their homestead in Mills River, and it needed a home. We built a 20-by-20-foot tractor shed on the north side of their barn, framed strong enough for the high winds that sweep across the field and tall enough for the tractor to drive straight in with the roll bar up. It stands on its own, but with a matching metal roof and a gable made from the barn's own old boards, it looks like it's been part of the barn all along. While we were at it, we opened up the old horse stalls inside the barn and put that wood back to work.
Specialty Outbuilding · Mills River · 13 days - (4 days for improvements to the old barn and 9 days to build the new tractor shed) · 20' x 20' freestanding tractor shed, metal roof, reclaimed barn-board gable, horse stalls opened up, loft strengthened, eaves closed in
Free in-home estimate · Written, detailed pricing · No obligation
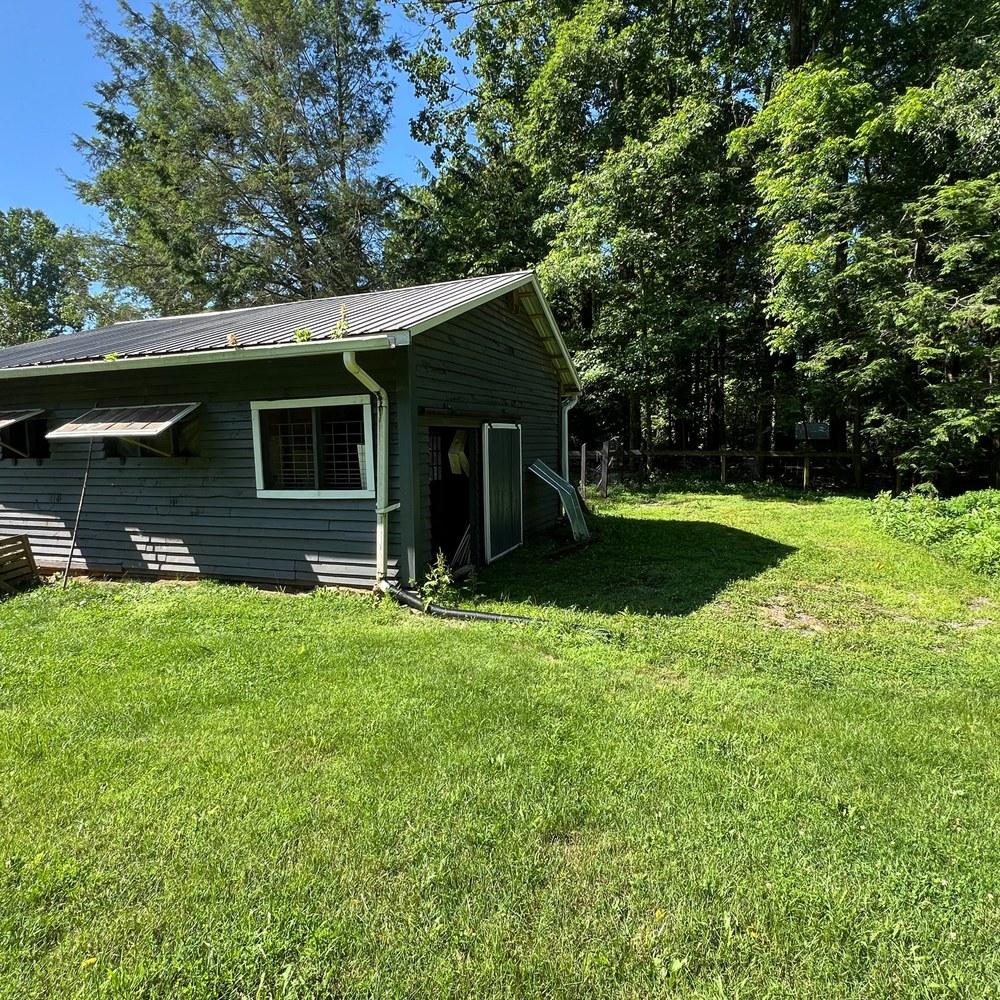
Before: the old barn, and the open grass on its north side where the tractor shed would go.
A New Kubota and No Place to Keep It
Thad called me right after they bought a small Kubota tractor for their homestead. They needed a shed to keep it out of the weather, along with the rest of their equipment, and they had some changes in mind for their old barn too. So we walked the property together, toured the barn, and picked the spot for the new shed right up against the north side of the building.
A Plan Built Around the Tractor
Back at the office, I drew up a simple building the same width as the barn, about 20 feet wide and 20 feet deep. The beams went high enough that the Kubota could drive straight in with its tall roll bar up, so nobody has to fold it down every time they park. Thad wanted a metal roof to match the barn, and he wanted the shed to stand on its own while looking like it had always been attached, so every part of the plan was built around those two things.
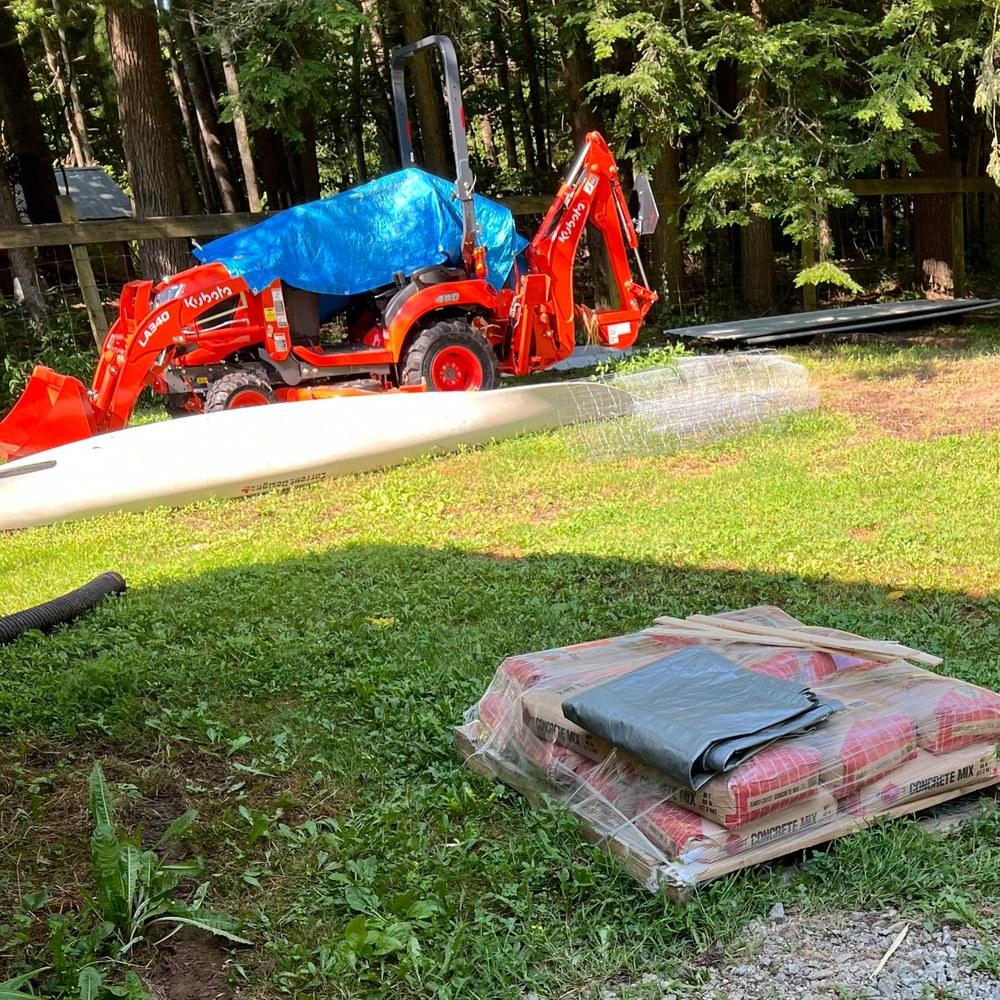
The new Kubota, waiting on its new home, with the concrete for the posts already on site.
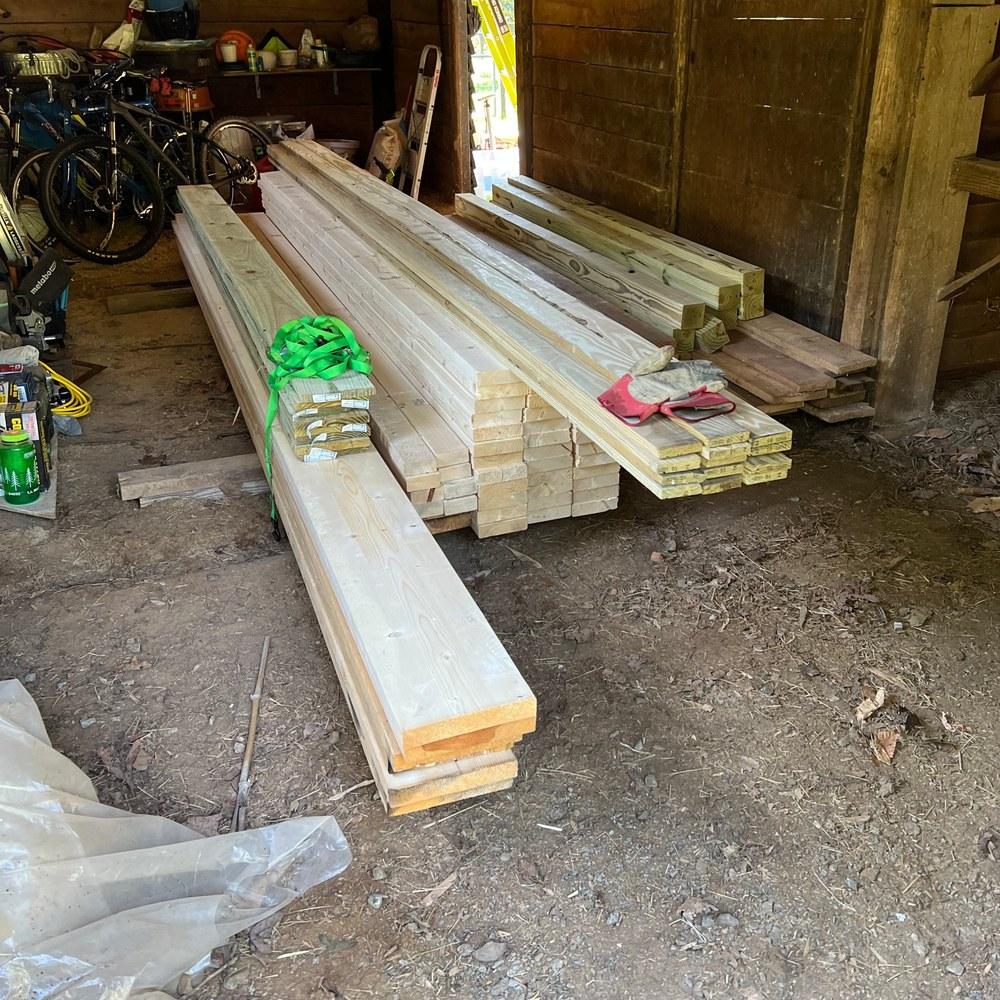
Inside the old barn, with the new lumber delivered and the stall walls ready to come down.
[Opening Up the Old Barn, and Putting Its Wood Back to Work
Before the shed went up, we spent about four days on the barn itself. We took out the partitions from the old horse stalls to open up the space, and instead of hauling that wood away, we put it back to work. Some of it went into strengthening the loft above the stalls so the family could store more up there, and some of it closed in the open eaves to keep the weather out. The rest we set aside for the new shed.
A Frame Built to Stand Up to the Wind
This shed sits out in the open field, where the wind can really pick up, so the frame had to be strong. Heavy posts went deep into the ground and were set in concrete, and every post got angled braces up to the beams to keep the whole frame stiff and square. The temporary boards you see running from post to post held everything plumb until the roof framing tied it all together.
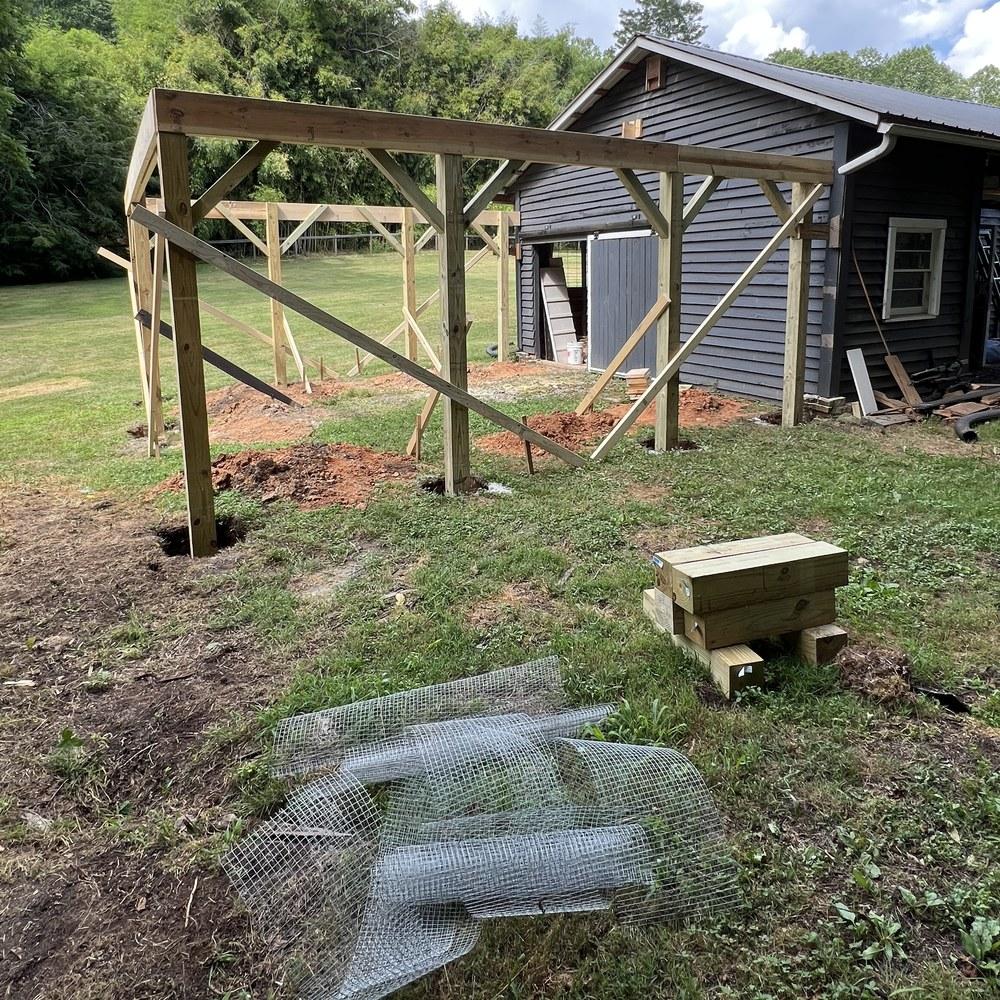
Posts set and braced, with the beams up and the barn just beyond.
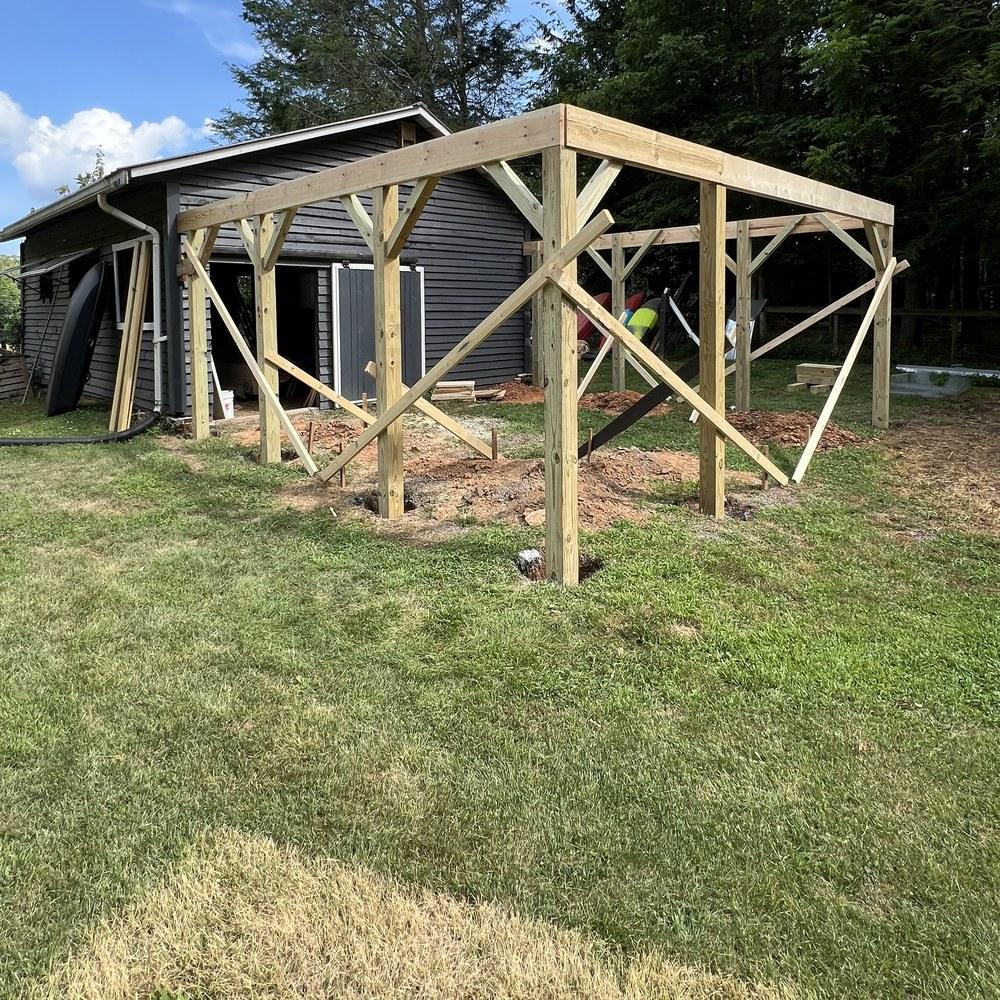
The shed's frame stands on its own posts, right alongside the barn.Before/During/After: what the photo shows]
Standing on Its Own, but Built to Look Attached
Thad wanted the new shed to stand on its own, with no weight leaning on the old barn, but he still wanted it to look like one building. So the shed has its own posts and beams right alongside the barn, and it runs the same width, so the two line up from end to end. Once the matching metal roof went on, you'd never guess they were built decades apart.
The Roof Framing Ties It All Together
By the third day the rafters were up, matching the pitch of the barn's roof, with the end gable framed and ready for siding. Once the rafters were tied into the beams, the whole building locked together into one stiff frame, and the temporary bracing could start coming off. From here it was the gable, the trim and the metal roof.
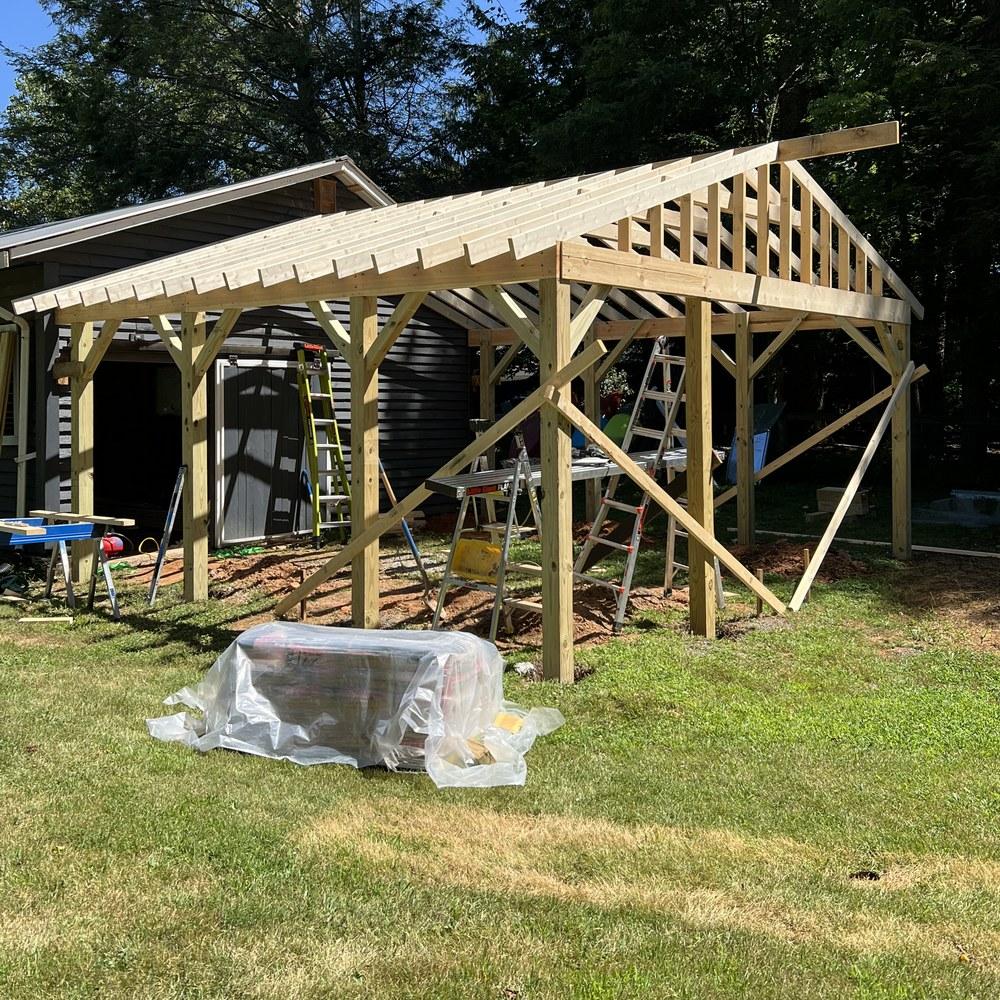
Day three: rafters on and the end gable framed.
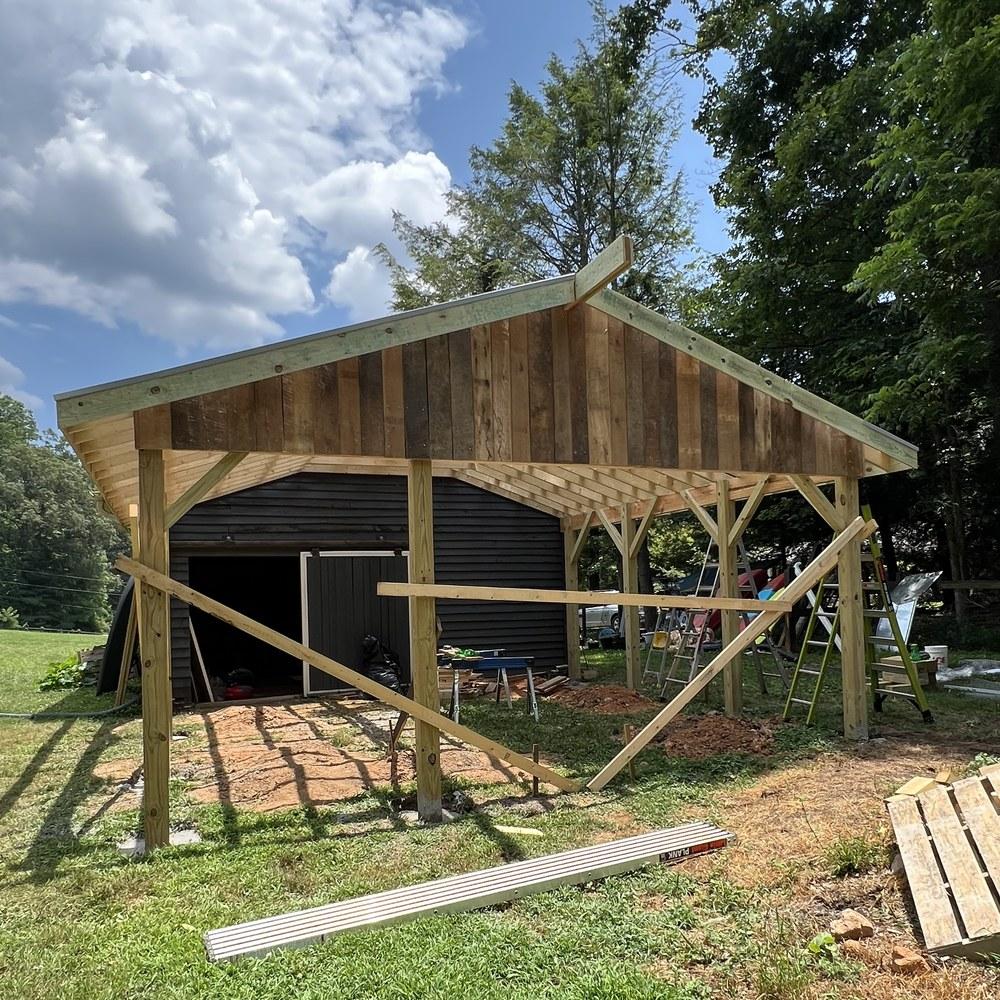
The end gable, sided with the barn's own reclaimed boards, sorted by hand to match.
Old Barn Boards, Sorted by Hand So the Gable Looks Seamless
Thad wanted the rest of the old stall boards to go on the new shed's end gable, and that turned out to be the trickiest part of the job. The boards were rough-sawn, so no two were quite the same thickness or width. I laid them all out in piles, sorted them by size, and fit the matching ones side by side, so the gable reads as one clean face of weathered wood with none of the differences showing. Thad was happy with how it turned out, and it's the first thing you notice when you walk up to the shed.
At a Glance
- A new Kubota needed a home on the homestead
- A 20' x 20' tractor shed, the same width as the barn
- Beams high enough to drive in with the roll bar up
- Posts set in concrete and braced to stand up to high winds
- Freestanding, but built to look like part of the barn
- A metal roof to match the barn
- Old horse stalls opened up inside the barn
- Stall boards reused to strengthen the loft and close in the eaves
- Rough-sawn barn boards sorted by hand for a seamless gable
- About 4 days on the barn and 9 days on the shed
Three Simple Steps
From Your Vision To a New Reality
Getting work done on your home shouldn't be a hassle. Here's how it works.
STEP 01
Tell Me About Your Project
Answer a few quick questions about your home and the job.
Takes about 2 minutes
Add photos if you have them
No cost, no obligation
STEP 02
I Will Meet You Onsite for a Quote
I'll call you to discuss the project, then set a time to see the job in person. You'll be talking with me, not a salesman.
A real phone call from me
In-home visit at a time that works for you
Straight answers, no pressure
STEP 03
You Get a Written Quote
I will provide all the details and specifications, line by line, no surprises. If it looks right, we pick a start date and I get the work done.
Firm, detailed written quote
Clean up every day
Finished on time
Free in-home estimate · Written, detailed pricing · No obligation
FREE IN-HOME ESTIMATE
Start Your Project
Fill out the short form and I'll call you to talk through the job. If it's a good fit, I'll come out, look it over, and give you a clear written quote. Prefer to talk first? Call me at (828) 761-6760.
Where I Work
Asheville, Arden, Hendersonville, Brevard and Waynesville
Nearby areas, just ask
Remodel Asheville · John McMullen · (828) 761-6760
Serving Asheville, Arden, Hendersonville, Brevard and Waynesville
Privacy Policy · Terms
© 2026 Remodel Asheville