Home Remodeling · Weaverville
A 1980s Mountain Retreat, Brought Up to Date One Room at a Time
Nine weeks, two and a half baths, every ceiling in the house, and a home that looks brand new inside.
Carol and her husband live and work in Charlotte, and for years this house in Weaverville has been their getaway from busy careers and city life. It was built in the early 1980s and hadn't seen a major update since, so Carol called me from one of my local ads and we walked through the house together to plan a total interior remodel. Because they weren't living there full time, we worked through it a couple of rooms at a time, which kept the rest of the house clean, protected and ready for their next visit.
Full Interior Remodel · Weaverville · 9 weeks · Smooth ceilings, 2½ baths, tile floors, new doors and trim, interior paint, one bedroom made into two
Free in-home estimate · Written, detailed pricing · No obligation
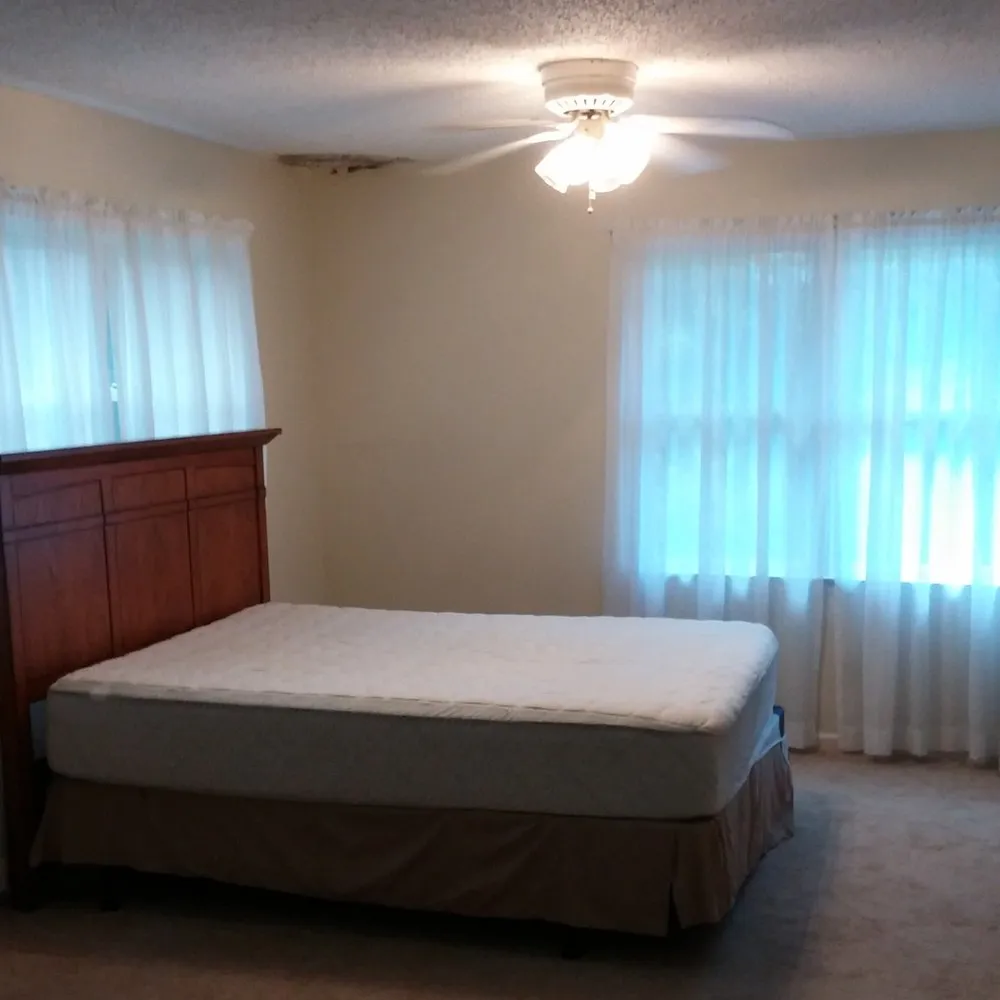
The big upstairs bedroom before: popcorn ceiling, original paint, and a room big enough to become two.
A Getaway That Hadn't Changed Since the Day It Was Built
Most of us move to these mountains for the same reasons, to get out into the hills and enjoy four real seasons, and this house had been doing that job for Carol's family for years. What it hadn't done was keep up with the times, because the popcorn ceilings, the doors, the bathrooms and the paint were all original to the early 1980s. Carol wanted the inside to feel as fresh as the view outside, so she gave me a long list and we went to work on it.
Sealing Each Room in Plastic Before the First Scrape
Taking down old ceiling texture can make a real mess, so before anyone picked up a scraper we emptied the room, laid drop cloths on every floor, and covered the walls and floors in plastic until the whole room was sealed. Here in the living room even the stone fireplace got wrapped, because that fireplace is the heart of a mountain home and I wasn't going to let a speck of texture settle into it. When the plastic comes down at the end, most of the cleanup comes down with it.
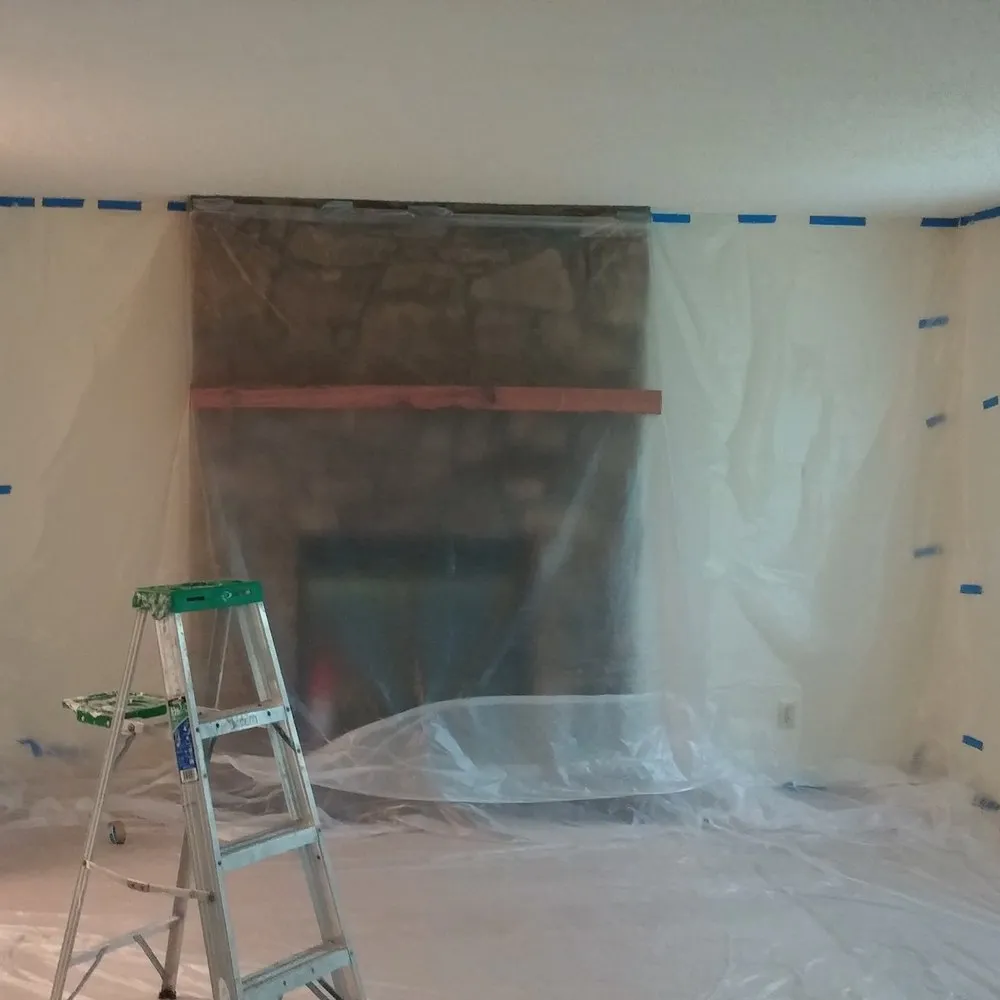
The living room sealed in plastic, with the stone fireplace and mantel wrapped and protected.
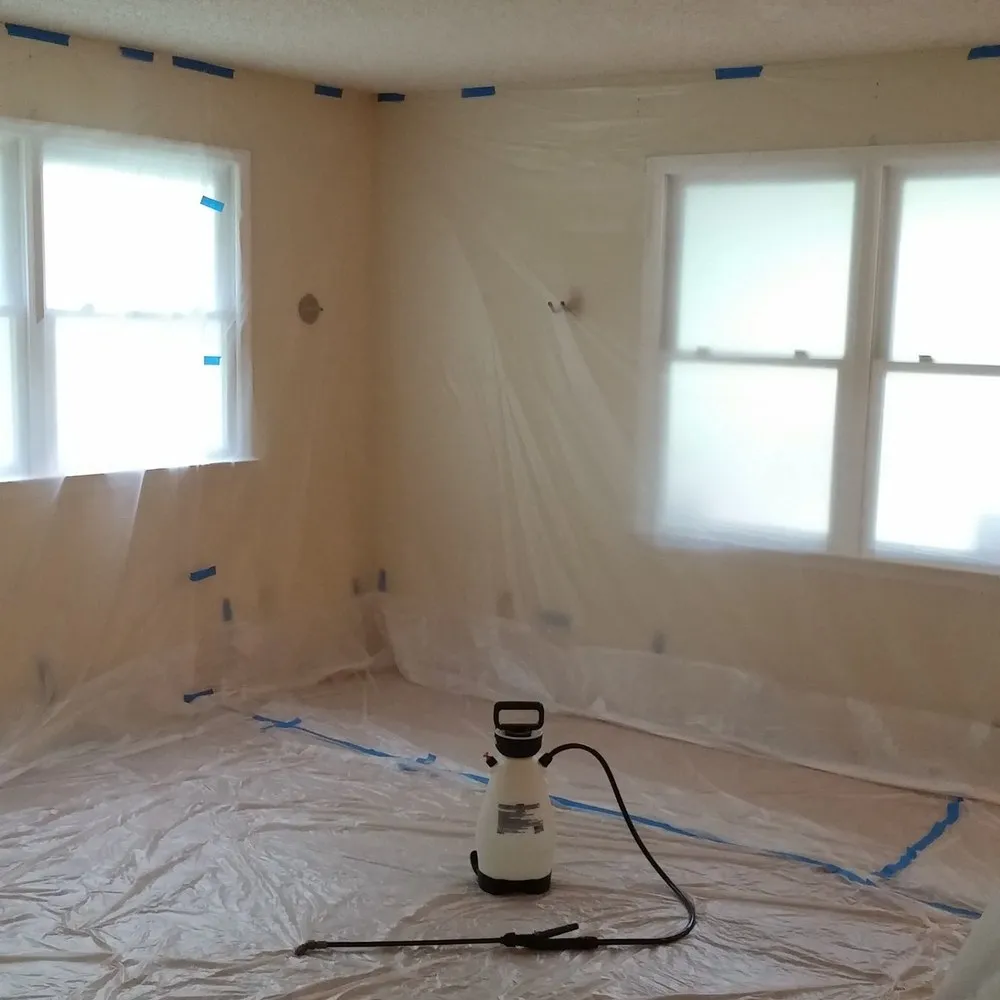
A bedroom sealed and ready, with the pump sprayer we use to soften the texture before scraping.
Scraping Off the Old Popcorn Ceilings
I've taken down a lot of these ceilings over the years, and the remedy is straightforward once the room is sealed. We wet the texture down with a pump sprayer so it softens and comes off clean, scrape it into the plastic, and then the ceiling gets skimmed, sanded and primed until it's smooth enough to paint. Done properly, the whole job goes smoothly, and cleanup is easy because everything that fell is lying on the plastic.
The Living Room, From Bare Ceiling to Finished
On the left, the popcorn is gone and the first coat of mud is on the ceiling, with the old yellow walls still waiting their turn. On the right is the same room when we were done, with a smooth white ceiling, a freshly painted beam and new wall color that lets the stonework stand out. Carol told us smooth ceilings are so much nicer than the outdated popcorn, and standing in this room you can see why.
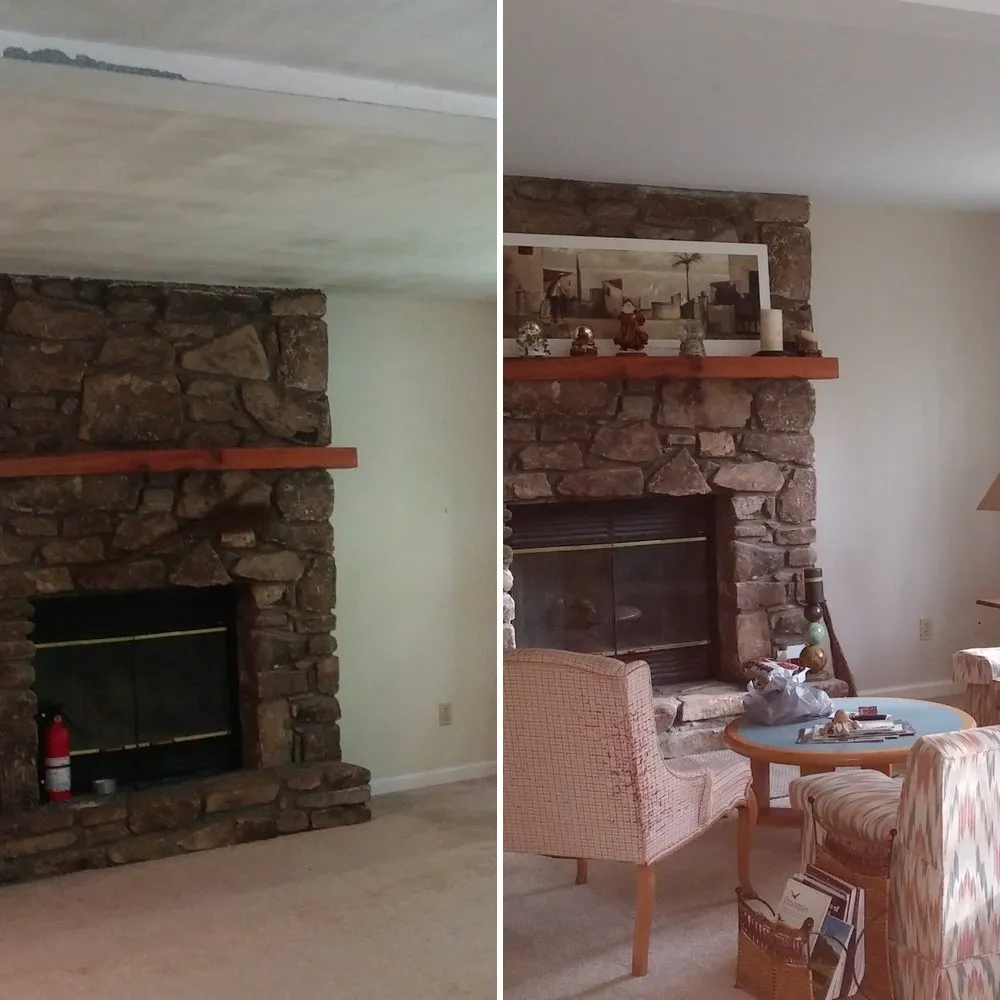
Same room, mid-job and finished: smooth ceiling, painted beam and fresh walls around the stone fireplace.
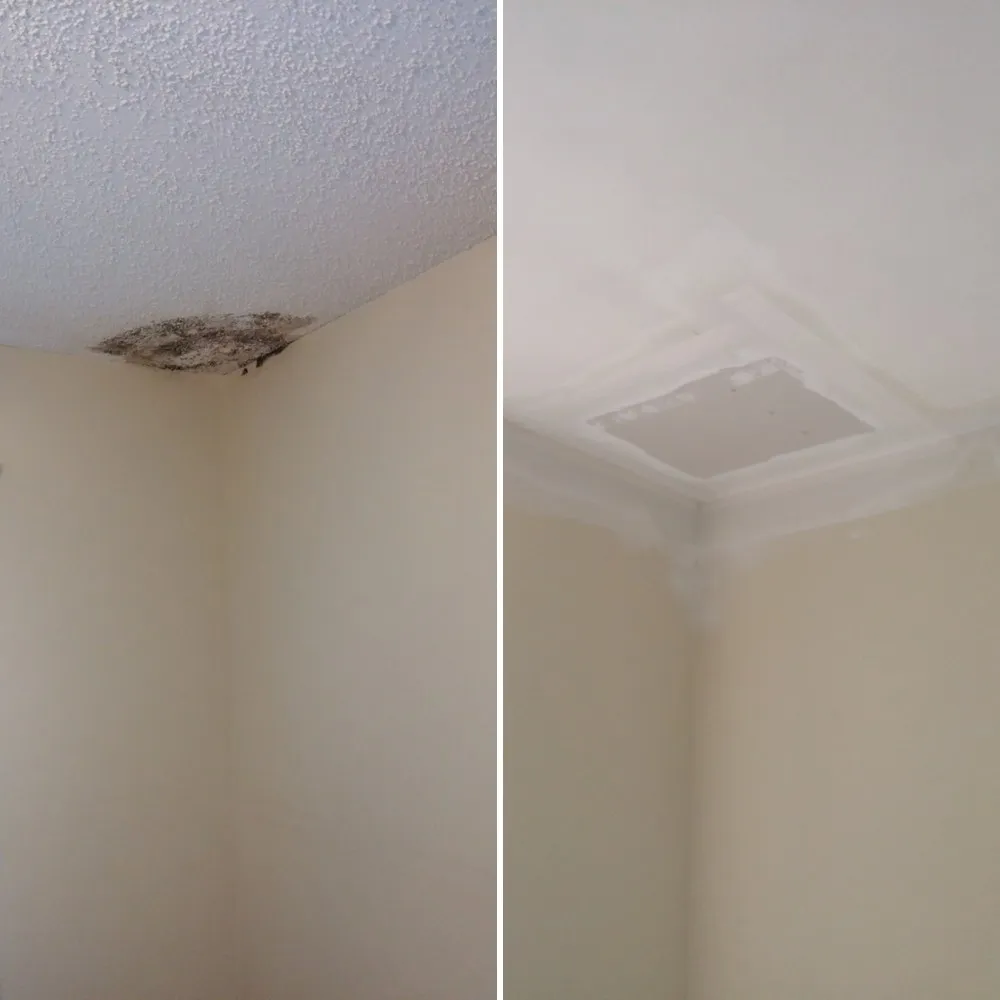
The mold spot from an old roof leak, and the new sheetrock patch going in after the bad section came out.
A Small Roof Leak with Mold. A Simple but Very Important Repair
The one surprise on this job was a spot in a bedroom ceiling where an old roof leak had let mold start growing. Carol had already had the roof repaired, so our part was simple: we cut out the damaged sheetrock, replaced the wet insulation above it, and patched the ceiling with new sheetrock. Once it was taped, mudded and painted along with the rest of the ceiling, there was no sign it had ever been there.
Turning One Big Bedroom Into Two
Upstairs there was one large bedroom that worked fine for a couple but not so well when family came to visit, so Carol asked us to divide it into two smaller rooms. Before we built anything, we marked the new wall and the new doorway on the floor with tape, so she could stand in each room and see exactly how much space it would have. Planning it out on the floor first is a lot cheaper than moving a wall after it's built.
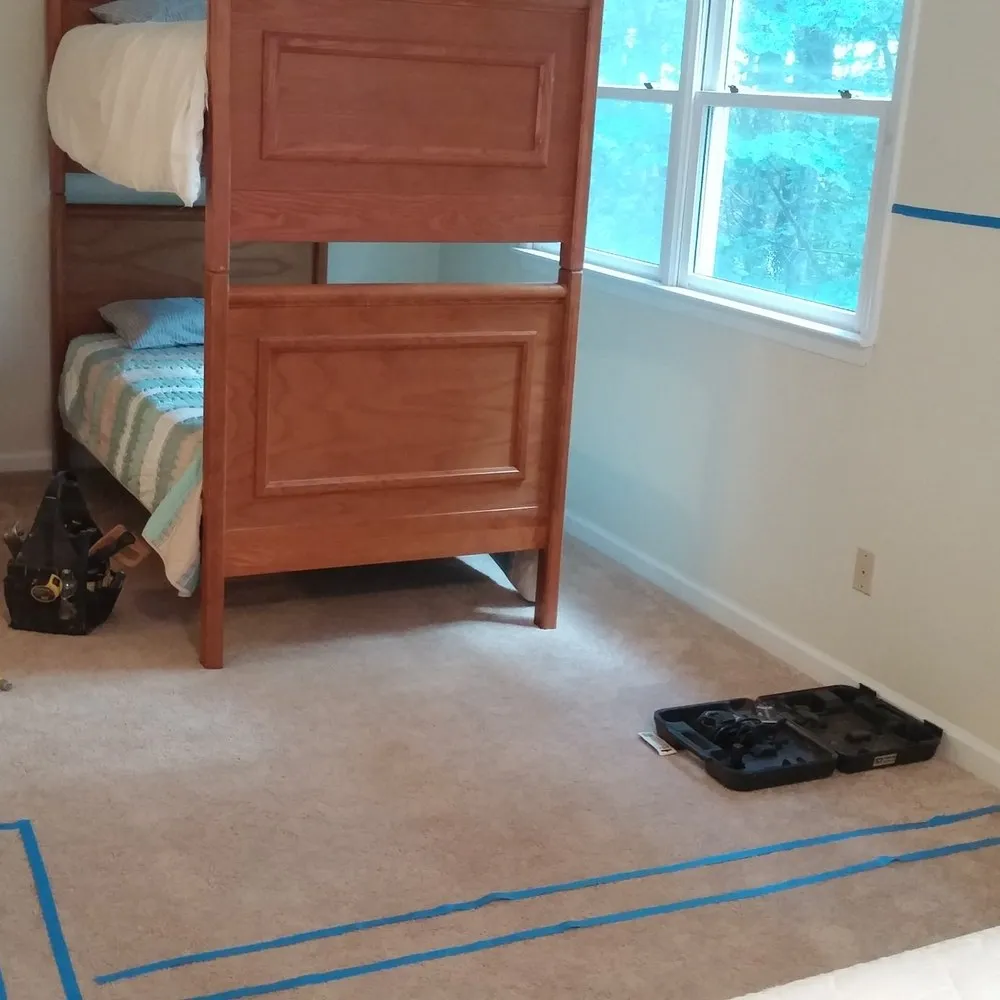
Blue tape on the floor shows where the new wall and doorway will go.
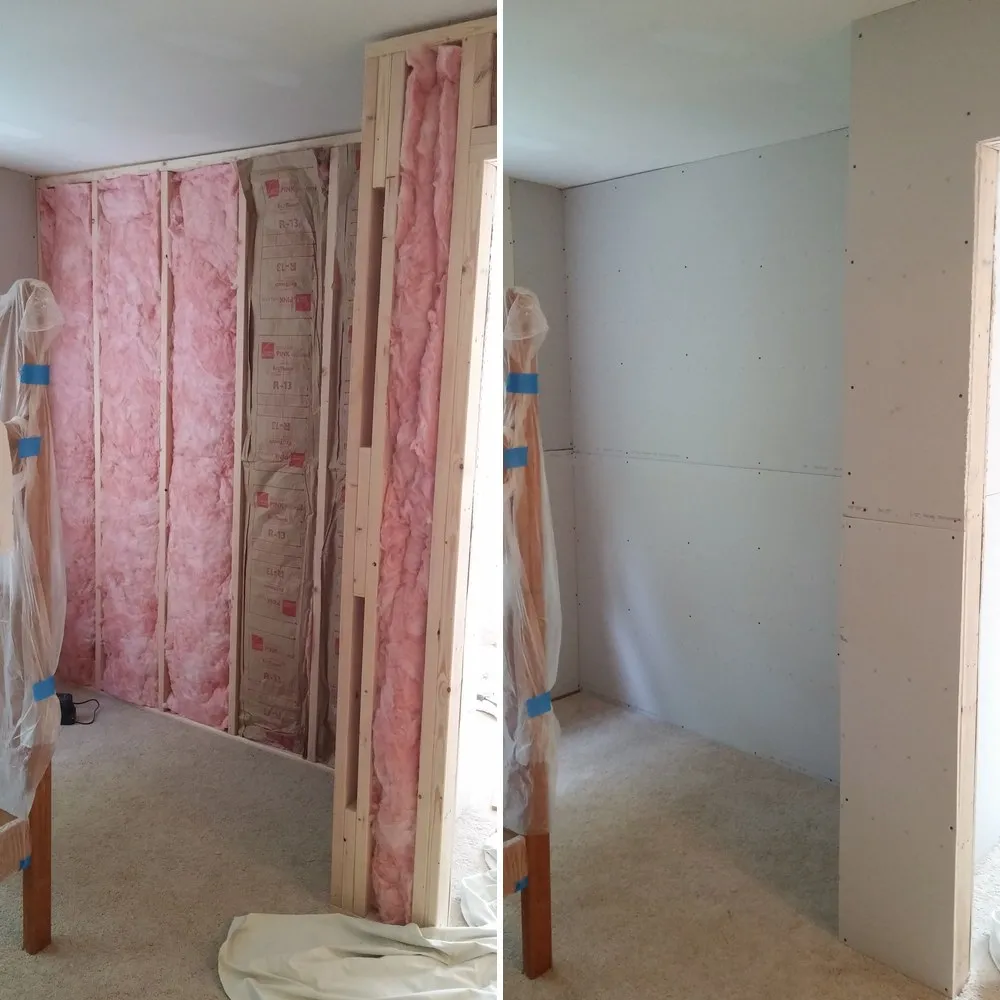
The new wall framed and insulated, then closed in with drywall.
Framing the New Wall and Closing It In
With the layout settled, we framed the new wall and its doorway, filled the stud bays with insulation so the two rooms stay quieter, and hung the drywall. Because we were working in a home full of furniture, everything nearby stayed covered in plastic, and we cleaned up as we went so Carol never came up to a mess. From here the wall got taped, mudded and painted to match the rest of the house.
Two Rooms, Each With Its Own New Door
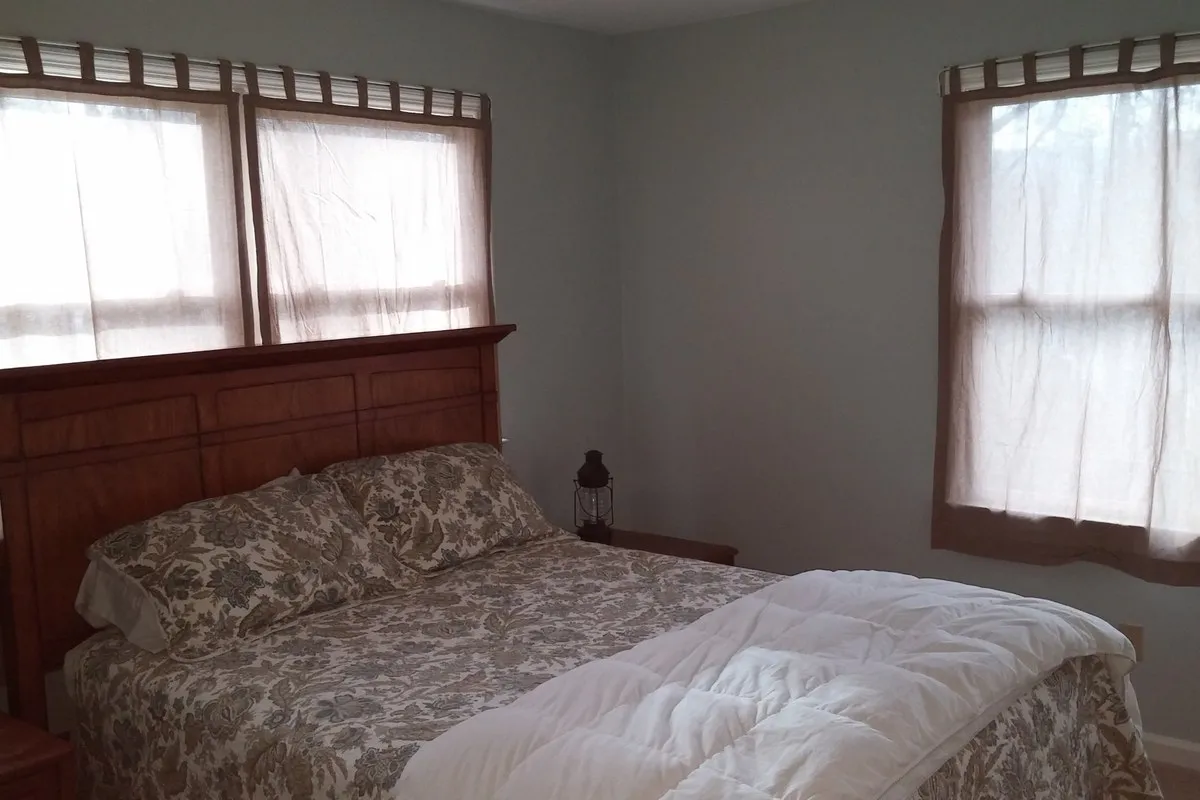
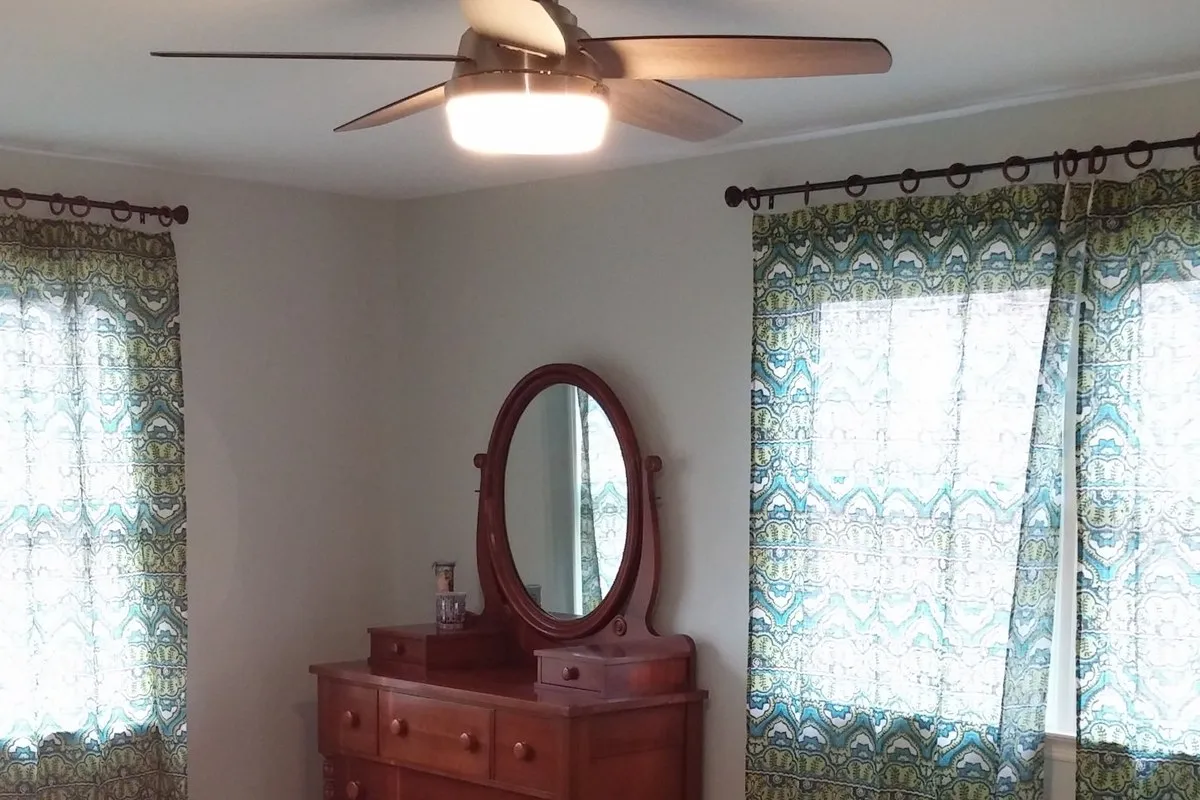
When the paint was dry, the big bedroom had become two comfortable rooms, each with its own doorway, its own new door and the same clean trim as the rest of the house. From the top of the stairs you'd never guess that wall wasn't part of the original plan, which is exactly how it should look. Now there's a proper room for everyone when the whole family comes up to the mountains.
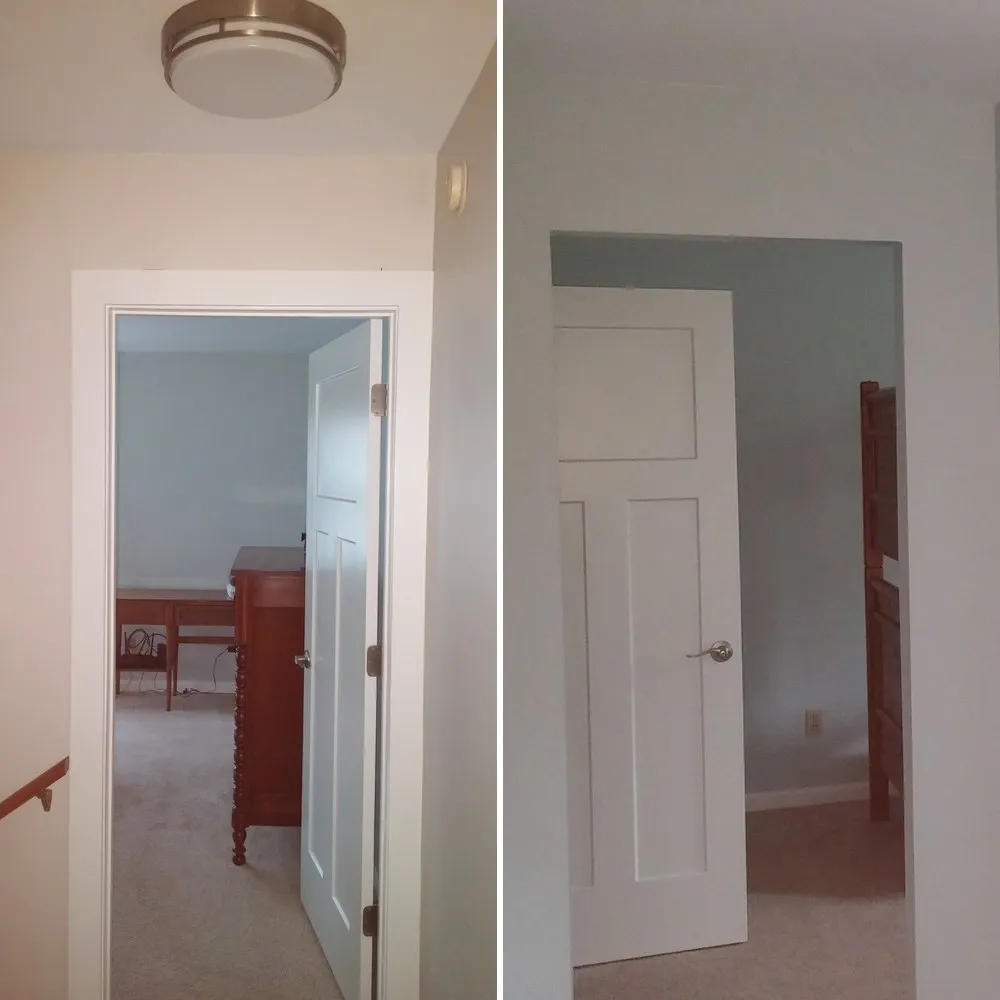
The new room from the hallway, and the finished wall with its door, painted to match the rest of the house.
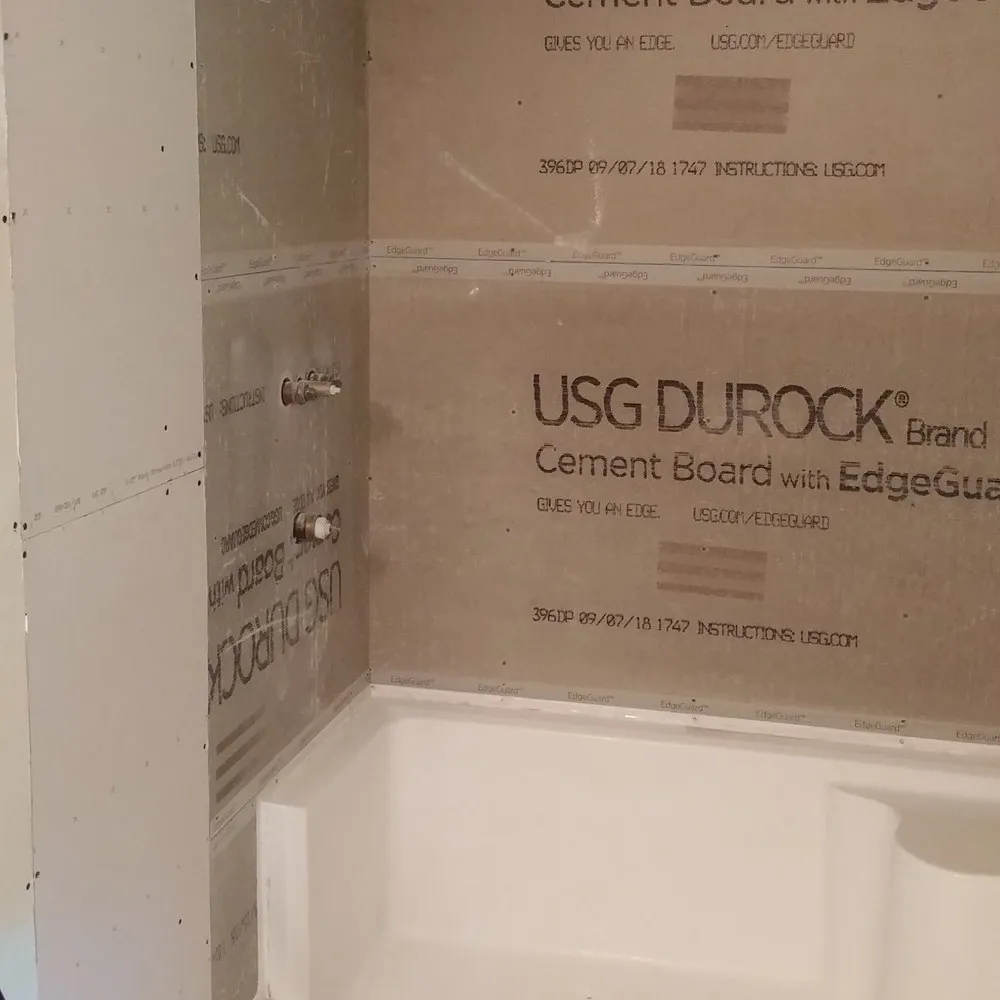
Cement board around the shower, ready for tile.
Down to the Studs in the Main Bathroom
The bathrooms were the biggest part of the job, so we took the main bath down to the studs around the shower and started fresh. The old surround came out, and the walls went back up in cement board, which holds up to water far better than drywall, so the new tile has a solid, waterproof backing that will last. We kept the seated shower base, since it was in good shape and Carol liked having the seat.
New Tile Going Up on the Shower Walls
Carol picked a warm, stone-look tile in large rectangles, and we set it in an offset pattern that makes the shower feel bigger than it is. A corner shelf went in as the rows went up, so there's a place for soap and shampoo without adding a caddy later. Setting each row level and tight is slow work, but it's what keeps the grout lines straight from the base all the way to the ceiling.
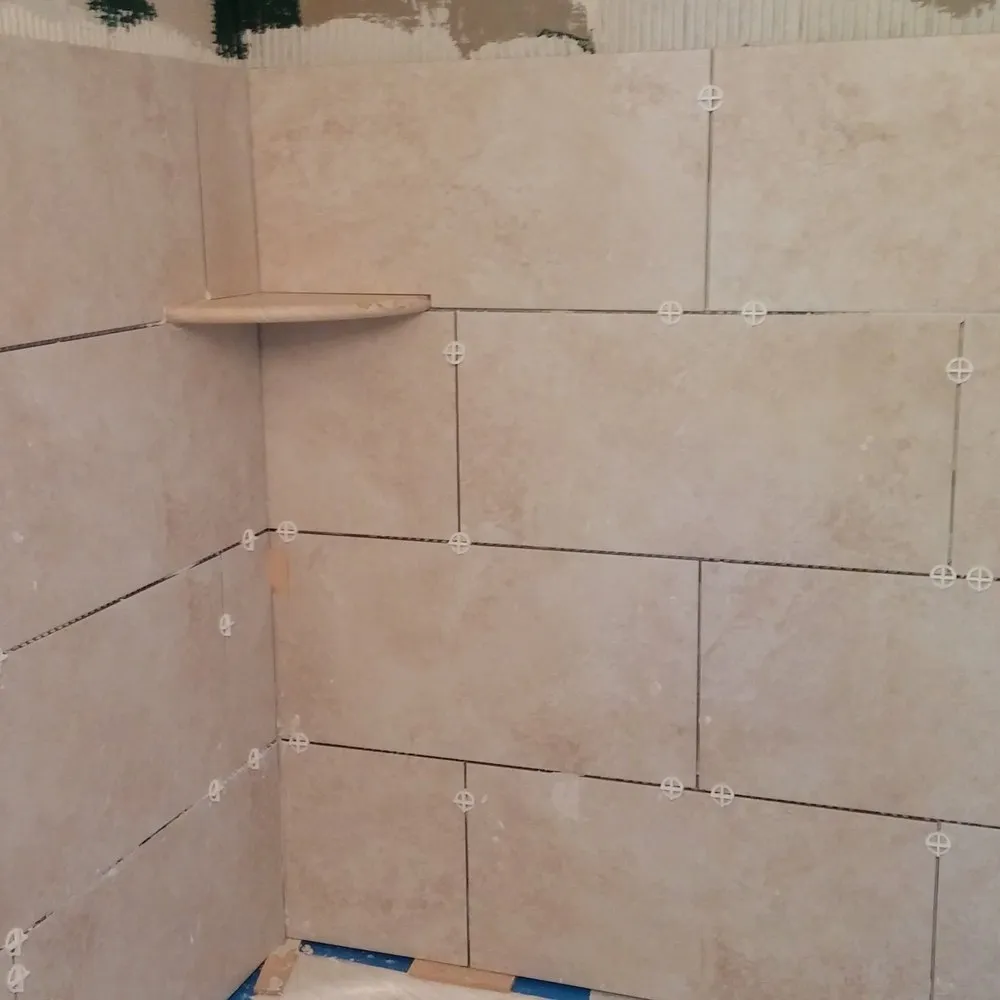
Large stone-look tile set in an offset pattern, with a corner shelf built in.
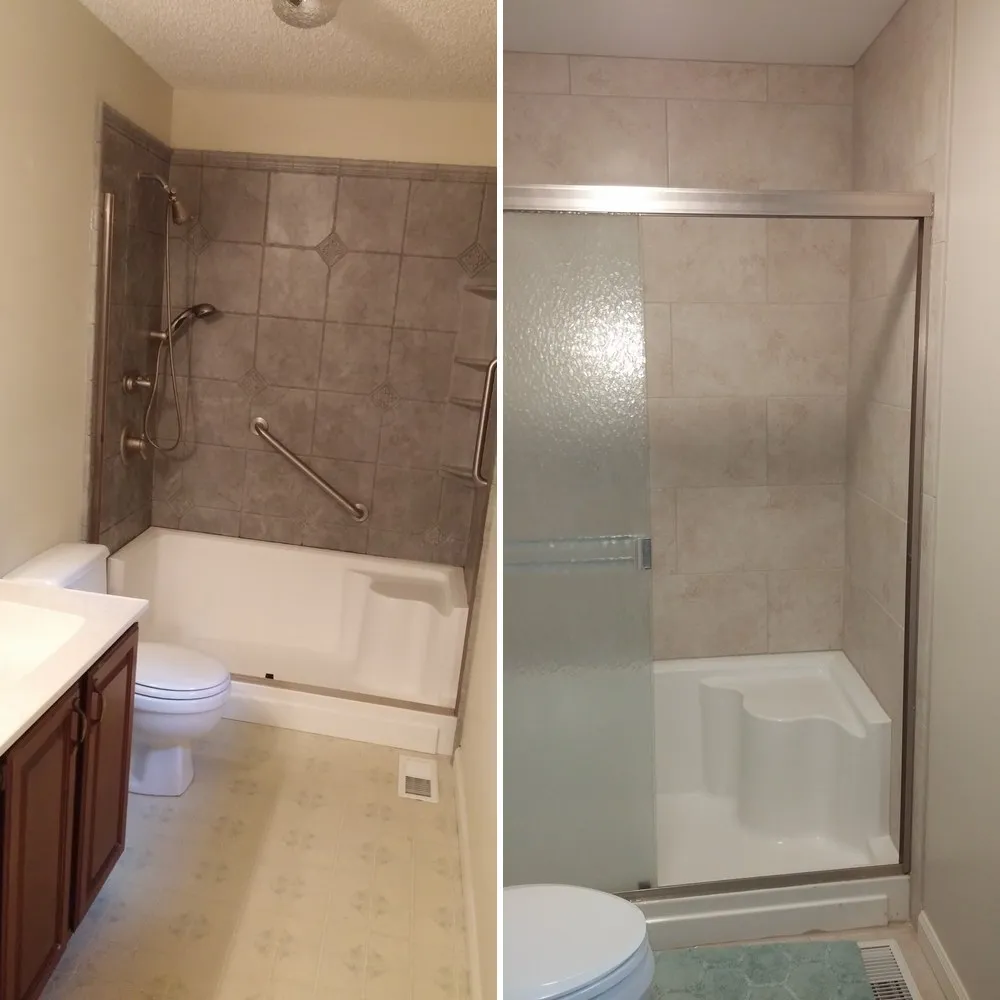
Same shower, before and after: new tile walls, a glass door and a tile floor.
The Main Bath, Before and After
On the left is the bathroom as it was when we started, with a gray tile-look surround, grab bars and a vinyl floor. On the right is the same shower when we finished, with new tile on the walls, a new glass door, a new tile floor and fresh paint, and it looks like a different room. Carol said she loves all the new tile, and this bathroom is a big reason why.
New Doors, Wider Trim and Smooth Ceilings Throughout
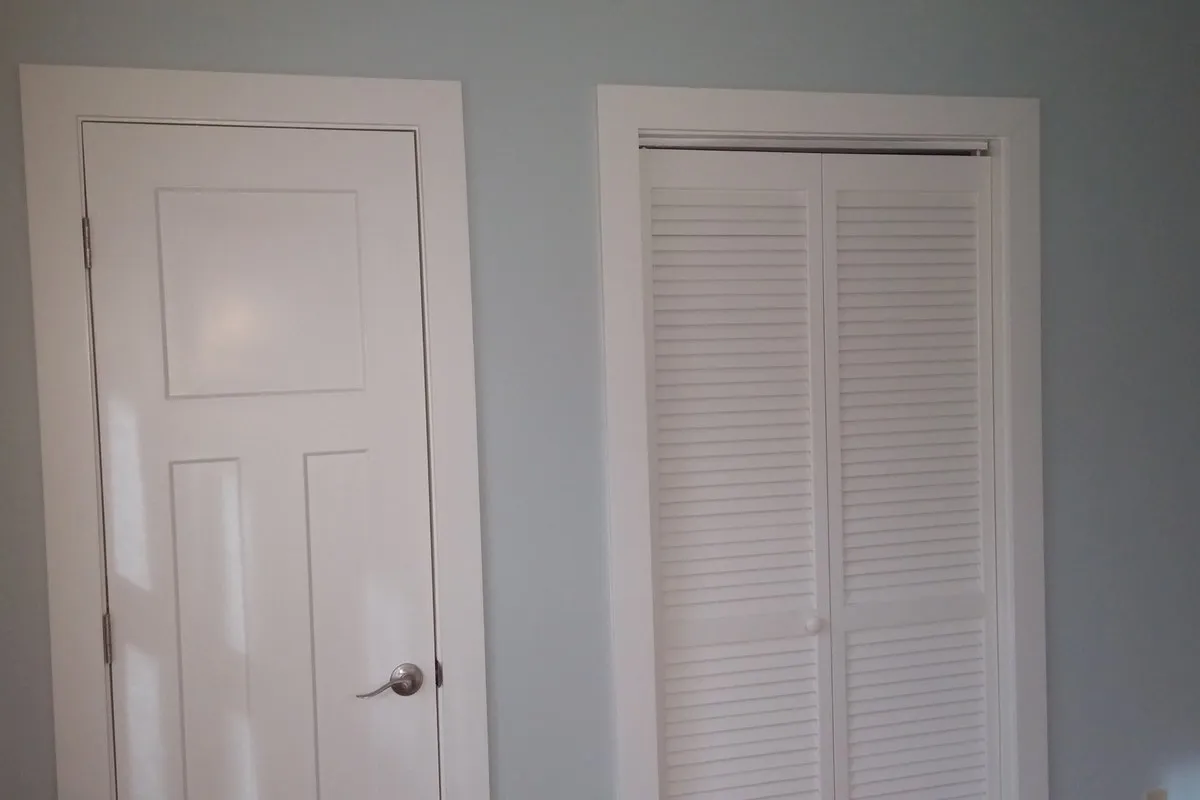
Carol wanted to get rid of the old doors, so every one of them came out and new three-panel doors went in, with wide, flat casing around each opening that gives the whole house a cleaner, more modern look. After that came prep and paint on every ceiling, wall and piece of trim in the house, which is what ties all the separate projects together. She told us she loves the style of the new doors and interior trim, and this hallway shows them off well.
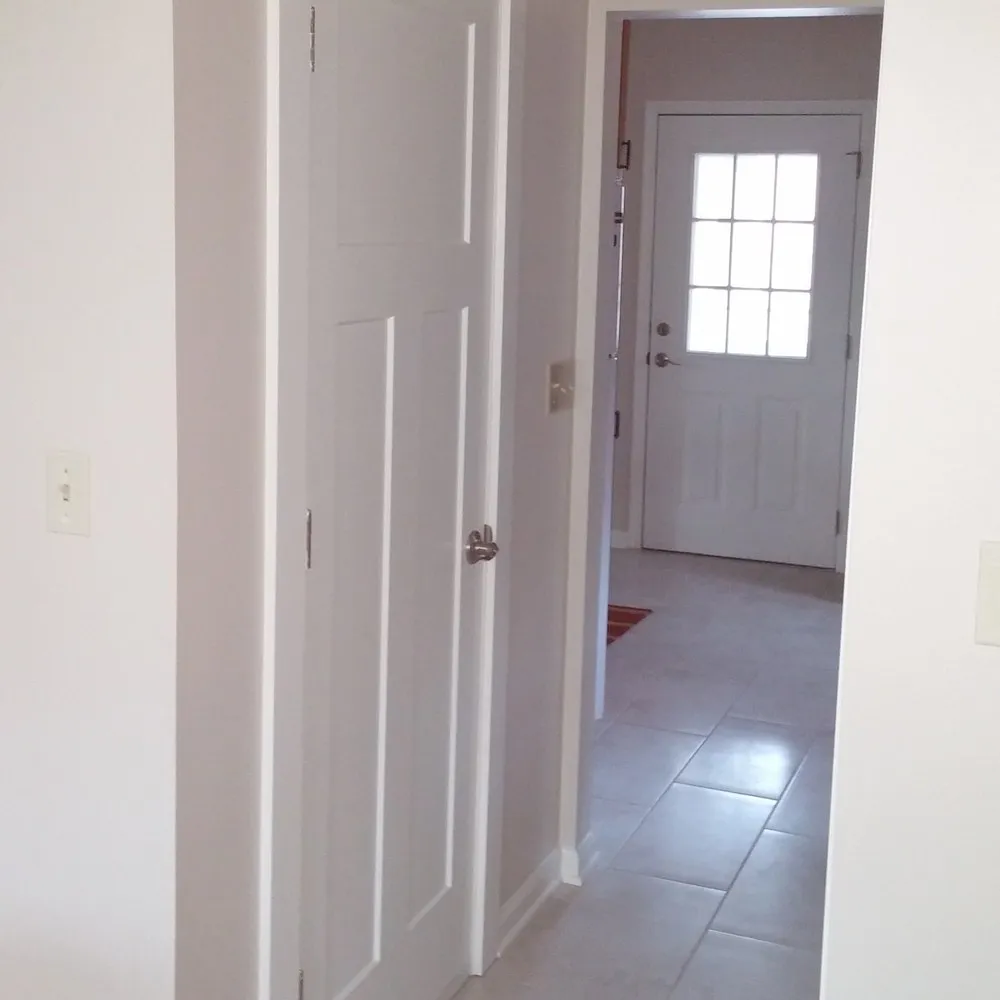
A new three-panel door with wide casing, smooth ceiling and tile floor running to the back door.
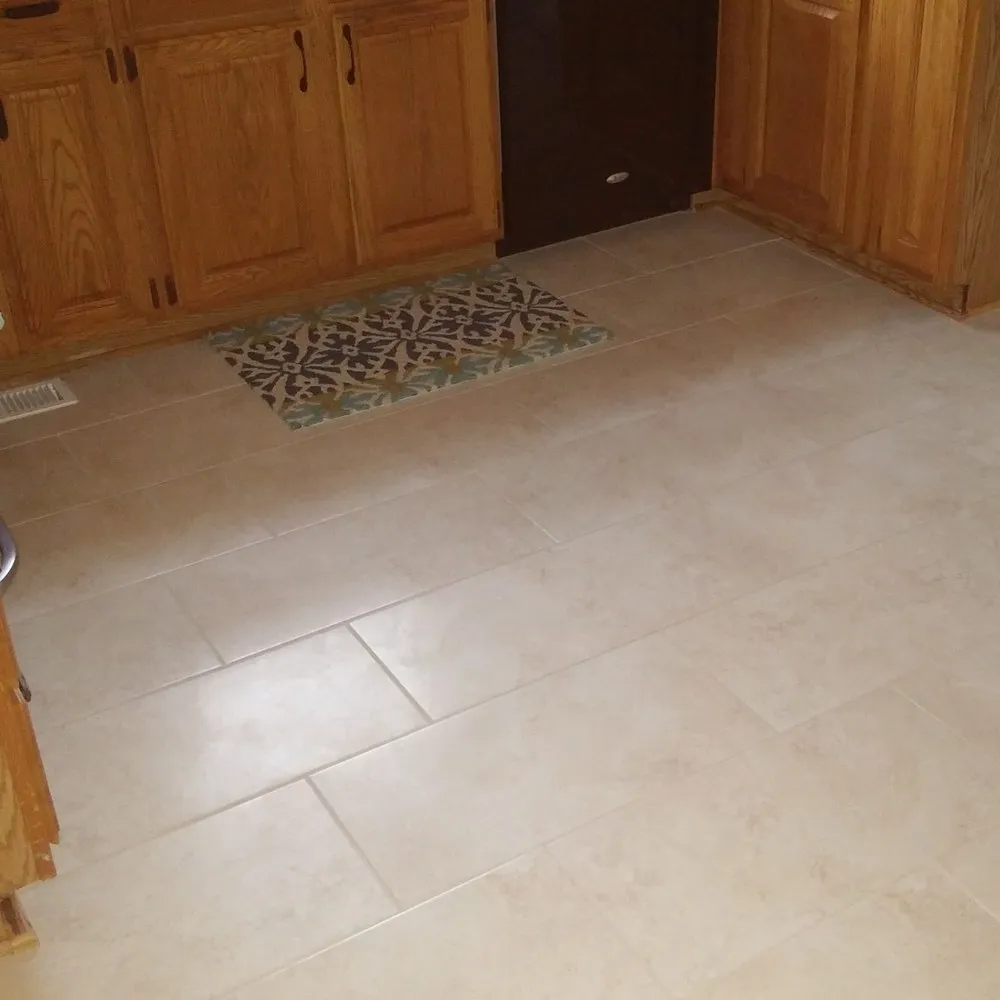
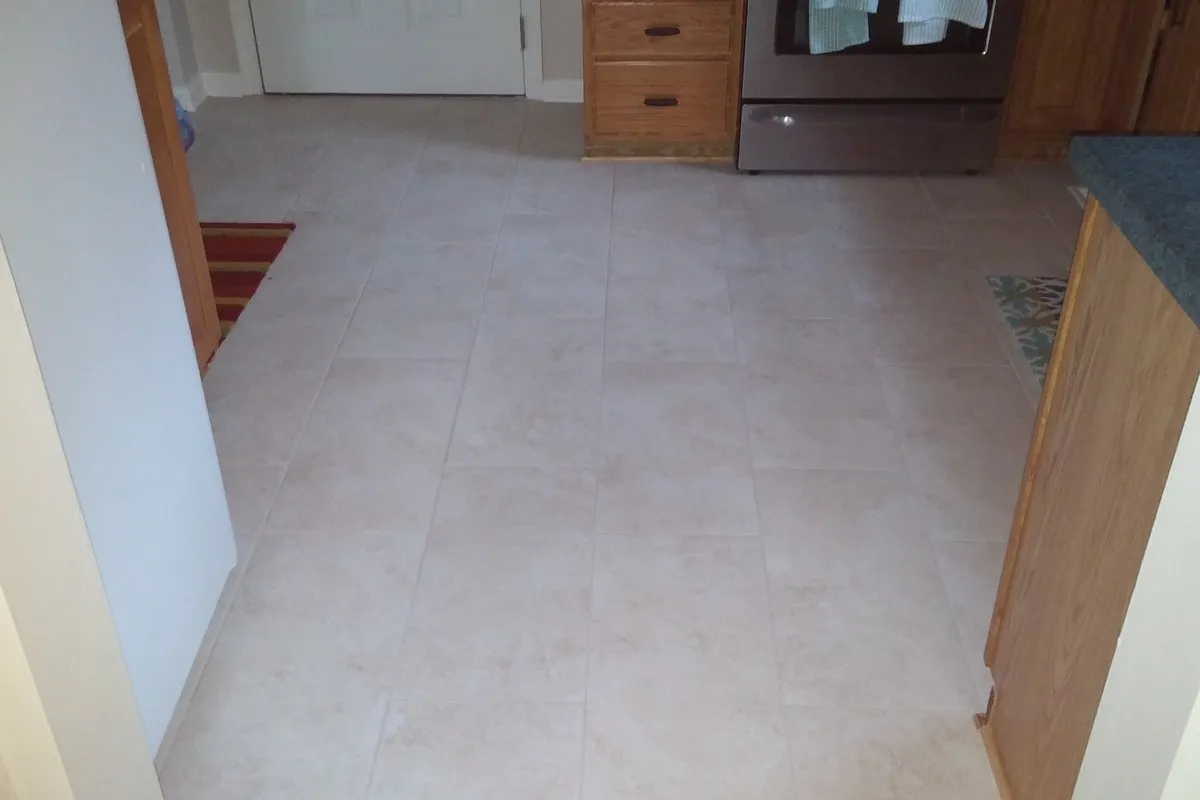
Large tile laid in an offset pattern across the kitchen floor.
Tile Floors in the Kitchen and Baths
The old floors in the kitchen and bathrooms came up, and we laid large light-colored tile in an offset pattern that brightens the rooms and stands up to muddy boots coming in from a hike. Because Carol wanted to keep some of the existing flooring elsewhere in the house, we protected it the whole time we worked and made clean transitions where the new tile meets it. A tile floor in a mountain house is about as easy to live with as it gets.
New Vanities to Finish the Bathrooms
To finish the two and a half baths, we installed new vanities with dark shaker-style cabinets, solid tops with undermount sinks and brushed-nickel faucets that match the door hardware. With the new tile, lighting and fresh paint, the bathrooms finally feel like they belong in the same house as the rest of the remodel. That's the attention to detail Carol mentioned, and it's the part of the job that makes everything else look finished.
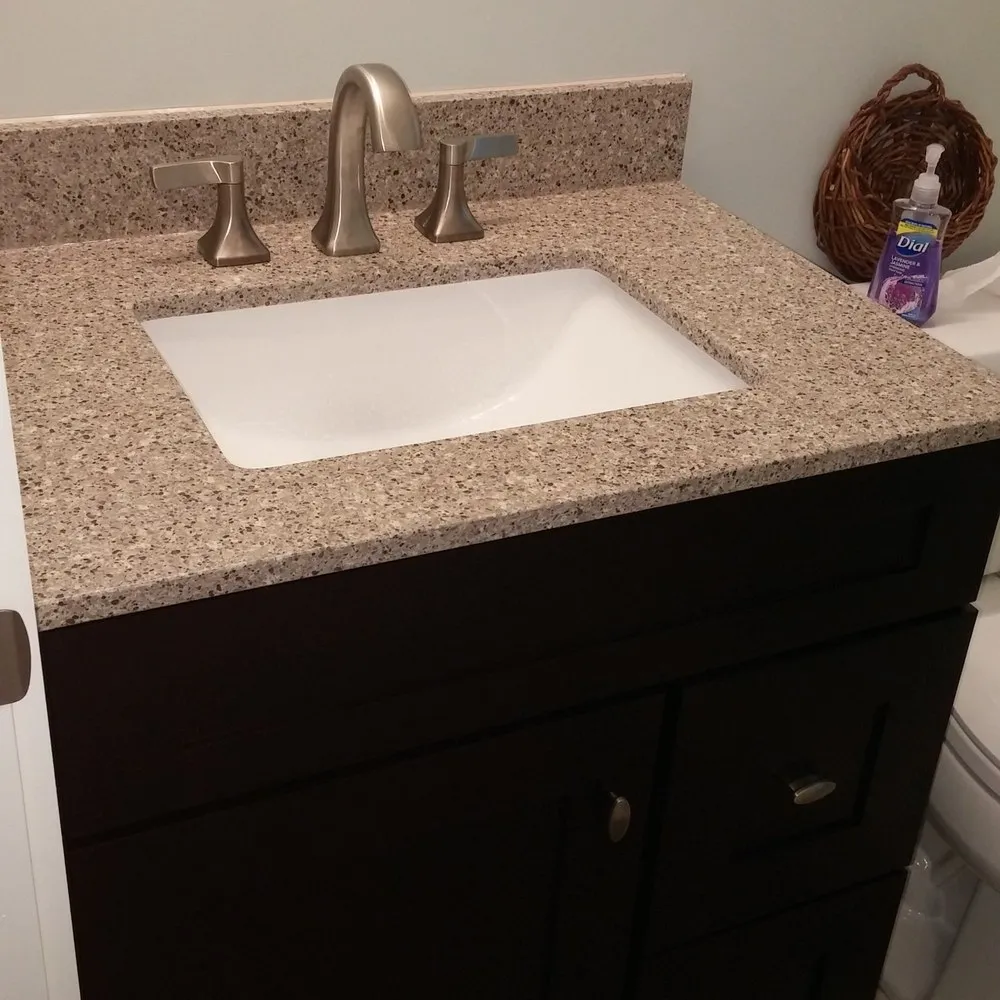
A new shaker vanity with an undermount sink in the half bath.
At a Glance
- A 1980s mountain retreat in Weaverville, updated top to bottom for a Charlotte couple's getaway
- Worked a couple of rooms at a time, so the house stayed clean and protected between visits
- Every room sealed in plastic before the popcorn ceilings came down, with the stone fireplace wrapped
- Ceilings scraped, skimmed and finished smooth throughout the house
- A small ceiling leak found, the moldy sheetrock and insulation replaced, and the ceiling patched
- One large upstairs bedroom divided into two rooms with a new framed and insulated wall
- Main bath taken down to cement board, with new tile walls and a glass shower door
- Two and a half baths finished with new vanities, faucets and lighting
- Large tile floors in the kitchen and baths
- New three-panel doors and wide, flat trim throughout
- Every ceiling, wall and piece of trim prepped and painted
- Done in 9 weeks, with Carol coming up every couple of weeks to choose colors and finishes
In Their Own Words:
"Our home looks brand new inside. I love the style of the new doors, interior trim and all the new tile. Smooth ceilings are so much nicer than the outdated popcorn ceilings. You did a great job, and we really appreciate the attention to detail. We love it!"
John and Carol L., Weaverville
Three Simple Steps
From Your Vision To a New Reality
Getting work done on your home shouldn't be a hassle. Here's how it works.
STEP 01
Tell Me About Your Project
Answer a few quick questions about your home and the job.
Takes about 2 minutes
Add photos if you have them
No cost, no obligation
STEP 02
I Will Meet You Onsite for a Quote
I'll call you to discuss the project, then set a time to see the job in person. You'll be talking with me, not a salesman.
A real phone call from me
In-home visit at a time that works for you
Straight answers, no pressure
STEP 03
You Get a Written Quote
I will provide all the details and specifications, line by line, no surprises. If it looks right, we pick a start date and I get the work done.
Firm, detailed written quote
Clean up every day
Finished on time
Free in-home estimate · Written, detailed pricing · No obligation
FREE IN-HOME ESTIMATE
Start Your Project
Fill out the short form and I'll call you to talk through the job. If it's a good fit, I'll come out, look it over, and give you a clear written quote. Prefer to talk first? Call me at (828) 761-6760.
Where I Work
Asheville, Arden, Hendersonville, Brevard and Waynesville
Nearby areas, just ask
Remodel Asheville · John McMullen · (828) 761-6760
Serving Asheville, Arden, Hendersonville, Brevard and Waynesville
Privacy Policy · Terms
© 2026 Remodel Asheville